Our first two nights in Japan, we stayed at a hostel called Tokyo Guesthouse Toco. Neither of us had every stayed at a hostel before. We usually stay at hotels so that we have our own private space but, when you’re travelling for 2 months+, you have to give up some of that privacy to save money. I think many people have the idea that hostels are cramped and dirty, perhaps even dangerous. That was definitely not the case at Toco.
Toco opened in 2010 and has been a very popular spot for tourists ever since. We’ve heard that it can often be hard to book a stay here due to the demand, but we had no trouble. Reservations open up 3 months in advance and I believe, not wanting to take any chances, I booked it as soon as the dates were available on their website.
Check-in starts at 4:00pm. Upon arrival, you enter the funky-looking lobby and one of the helpful, English-speaking staff greets you. You pay your bill up front, in cash, and fill out a guest registration. Then they will take you on a brief tour, showing you the amenities, explain the rules and expectations, and show you your room and bunk.
There are 3 dormitory-style rooms, with 8 bunks each, one of which is women only. (There is also a private room on the upper floor, but that is more money, obviously). You pay per bunk and the price is dependant on the season – busier times being a bit more money, but regardless of when you stay, the price is very inexpensive. In mid-October, we paid 3,000 yen a night each.
Each bunk is enclosed with curtains for privacy and is equipped with a light and an electrical outlet. (Make sure you bring an adapter with you if you need it.) There is also room for a suitcase under the bottom beds. You can either use a pad lock you bring with you or they can rent one to you. Bedding is provided but towels are for rent. (We also brought our own so I’m not sure of the size and price.)
There is a shared kitchen space, where you can hang out to eat a snack or cook a meal with the pots, pans, plates, and some condiments and spices provided. There is also coffee and tea and you can use the fridge to store your food and drinks.
There are 2 toilets (Japanese “robot toilet” called a washlet) and 2 shower rooms. Everything was very clean and well kept, looking fairly new. There is also a hairdryer you can use (during certain hours).
They had a cool handmade “Tokyo Guide Book” and a huge stack of previous guestbooks that were fun to flip through. I MEANT to write something in the current guestbook on our last morning there but we were so rushed, I forgot!
For 400 yen, you can have breakfast – 2 handmade onigiri and a bowl of miso soup. They’ll ask you the night before if you want to opt in for that. I saw pictures and it looked really nice but breakfast starts at 7am and both mornings, we were out before that.
From 7:00-11:30pm each night, the lobby opens to guests and the local public as a small, intimate bar. The warm, inviting space (with the Instagram-worthy rainbow staircase) and the friendly staff make for a lively yet restful spot to sit while you dump all your day’s pictures onto your hard drive.
Each night of your stay, you are given a free drink to start you off. I am not a drinker so I was just going to give mine to Jason but I decided I’d try out umeshu (Japanese plum wine) for the first time. I was very pleasantly surprised as how delicious it was!
There are actually 2 separate buildings. The lobby is the concrete-looking building that faces the street (that you can see in our video). To reach the actual accommodations area, you go through a sliding door at the back of the lobby and across as stone pathway to the restored 100-year-old traditional house.
Shoes are not allowed in the accommodations area. You can leave yours on the shelves just outside the door. You don’t have to worry about them there. It was pouring heavily the first night but are shoes were not wet at all in the morning. That area is covered by a porch.
The whole reason I picked this place to stay specifically is because I had seen it featured on two different NHK World TV shows that I watch frequently – Tokyo Eye and #Tokyo. (Can’t recommend highly enough using NHK as one of your sources of inspiration when you plan your own trip!) I was enamored by the traditional house and the beautiful little garden. My bunk was situated next to the sliding, paper shoji screen wall. Beyond that was the hallway, flanked by vintage glass doors all the way down, looking out into the garden. (And as Jason says in the video, the old wooden floors are pretty spectacular.) It was like something right out of my dreams!
The garden has a stone pathway, a footbridge and a koi pond. There are beautifully lush green plants and trees everywhere – very picturesque. The chirping crickets and birds and the trickling of the water in the pond was peaceful and serene. I wish I had had more time to just sit and soak it all in.
Opposite the glass wall is a large pile of stones, seemingly leading off into a different world. This is called a Fuijizuka. They were made all over Tokyo in decades past for people who wanted to visit Mount Fuji but were unable to for one reason or another. Apparently, people made them out of stones actually brought back from the sacred mountain, therefore they were imbued with Fuji’s power.
Toco is located about 10 minutes from Uguisudani station, on the JR Yamanote line – very easy for new tourists to Japan to get to.
It’s also 2 minutes from Iriya station on the Tokyo Metro Hibiya line.
I give Toco a full 5-stars, 10 out of 10/would recommend! If I ever get the chance, I would love to stay here again.
For more information on that choice and the differences, check out the very last step in our Japan Trip Planning blog post.
Once you are through customs, it’s easy to find the Monorail gates (and the JR East Travel Service Center, if you’re planning to pick up some JR passes – they are right next to each other). Everything is clearly marked overhead. After you leave the arrivals exit, go straight and then to your left.
It was really crowded and busy when we arrived so we didn’t want to slow the line down by trying to take pretty, clean video footage. We apologize for the awful videography! Trying to rush through multiple steps while holding a camera in one hand is not ideal.
You can’t really see what buttons are being pressed but the ticket machine is pretty straight forward. (If you need it completely spelled out for you, the official Tokyo Monorail website has step-by-step instructions.)
Pro Tip: You have to press the buttons on the screen pretty hard for your touch to register.
The English mode button is at the top right and boldly marked.
It is 500 yen for a one way adult ticket to Hamamatsucho station. This machine is cash only – no credit or debit! It accepts 1000, 2000, 5000 & 10000 yen bills and 10, 50, 100 & 500 yen coins.
You can choose either a ticket to Hamamatsucho station only or buy a combination transfer ticket to a stop along the JR Yamanote line. We were stopping at Hamamatsucho for awhile before heading on to our final stop so we went with the basic ticket.
On weekdays, the prices for the combination tickets depend on which Yamanote stop you’re headed to. There is more information on the Monorail website.
For example, if we had not stopped off at Hamamatsucho for ramen, we would have transferred to the Yamanote and gone on to Uguisudani, which was the closest station to the hostel we were booked at for our first night. The weekday Monorail/Yamanote combination ticket doesn’t give you a discount but it saves you having to buy another ticket at Hamamatsucho station. (The combination ticket going to Uguisudani is 670 yen. Buying a ticket at Hamamatsucho to Uguisudani is 170 yen. Same price. Just more convenient.)
However, on weekends and holidays (and other select dates), the combination ticket with a final stop on the Yamanote line is still only 500 yen. You aren’t charged the additional price that the rest of the trip would cost.
I think that the discount ticket option appears at the bottom of the screen only on those days. During the week, there are 3 lines of options and the bottom is blank. Since we haven’t been on a weekend ourselves, I can’t say for sure, but I’ve seen pictures.
Along the left hand side, you can opt to by a specific group of tickets at once instead of one transaction at a time. (Options: 1 adult, 2 adults, 3 adults, 1 adult & 1 child, 2 adults & 1 child, 1 adult & 2 children, 1 child, 2 children) Since there are 2 of us and we are both adults… we obviously chose the ‘2 adults’ button.
Alternatively, if you aren’t going the entire way to Hamamatsucho, you can choose any of the stops along the way on the Monorail line.
There is also a platform ticket option for 160yen, if you just wanted to go up there, take a look around, and come back down – if that’s your thing.
Get a receipt, if that is how you are tracking your transportation expenses, because one you pass through the departure gates at your final station, you don’t get your ticket back.
You can also buy a Suica card or top up your existing IC card here too.
The JR East Travel Service Center is just to the right of the Monorail gates. We originally planned to hand in our exchange orders and get our passes but it was SO busy when we got there. (The line was actually 3 times longer when we walked up than it was in the video.) We didn’t need our passes for another week so we didn’t feel like waiting just then. We were hungry and tired and wanted to be on our way. They seemed to get through the line pretty quickly though so if you NEED to get your passes immediately, don’t be too daunted by a long line.
Just a reminder: If you do get your JR pass and have it starting on the same day, you can use it to ride the Monorail for free. Go through the left-hand side of the ticket gates and show your pass to the attendant in the glass-enclosed booth.
When you go through the gates, put your ticket into the slot, walk through, and pick your ticket up on the other side. Do not forget to take it and keep it safe. You need it to exit your destination station!
Once you pass the gates and follow along to the right. There are vending machines here AND up on the platform. (We stopped to get some drinks here because it’s hot in there! We got drinks from this very machine as our first purchase back in 2015, so we thought it was funny to do it again. We have a video for that up already! 😀 )
Head up the escalator and then you’re on the platform.
The Monorail makes its first stop at Haneda Terminal 2 at 5:11am and continues service all day until 12:05am. There are local (hitting every stop), rapid (some stops), and express (direct to Hamamatsucho only) trains, so if you are heading to a stop other than Hamamatsucho, make sure to take that into account and get on the proper one so you don’t miss your destination. If you are staying aboard for the entire line however, there isn’t much of a time difference between the three. The full ride takes about 20-25 minutes from Haneda to Hamamatsucho and it comes roughly every 3-6 minutes. (See the complete schedule on the Monorail website.)
Note: There is a teeny error in our video! The first and last train times Jason mentions are for Terminal 2. Turns out… we arrive at Terminal 3. (Our plane tickets just said “International Terminal”.) The first train departs at Terminal 3 at 5:18am and the last one is at 12:10am.
The digital departures board on the platform cycles through Japanese, English and Korean and lists the next trains for the local, rapid, and express lines. It also has a dot for each upcoming station that train will stop at, in case you aren’t sure which line goes to your stop (if not Hamamatsucho).
There are designated luggage racks at the ends of each car. They probably fit about 8-10 suitcases, so space is limited, especially during peak times. We had 4 AND our backpacks and we felt really horrible about taking up so much room. I think, next time we’ll use the Takkyubin service and have our luggage sent to our hotel from the airport directly.
Jason was pleased that the Monorail has free Wi-Fi on board. And that it actually worked! Neither of us could get a stable connection within the actual airport. Maybe it was just too busy at that time of day.
As we mentioned in Part 2 of our Japan Trip Planning videos and blog post, there are several ways to get into the “downtown” Tokyo area, which is where the majority of tourists would be staying, from the airport. For us, we find the Monorail to be the easiest, fastest, cheapest and most convenient. If you want more information about the other methods or information about arriving from Narita Airport, please take a look at those. (Keep in mind though that all the fares mentioned increased slightly as of October 2019.)
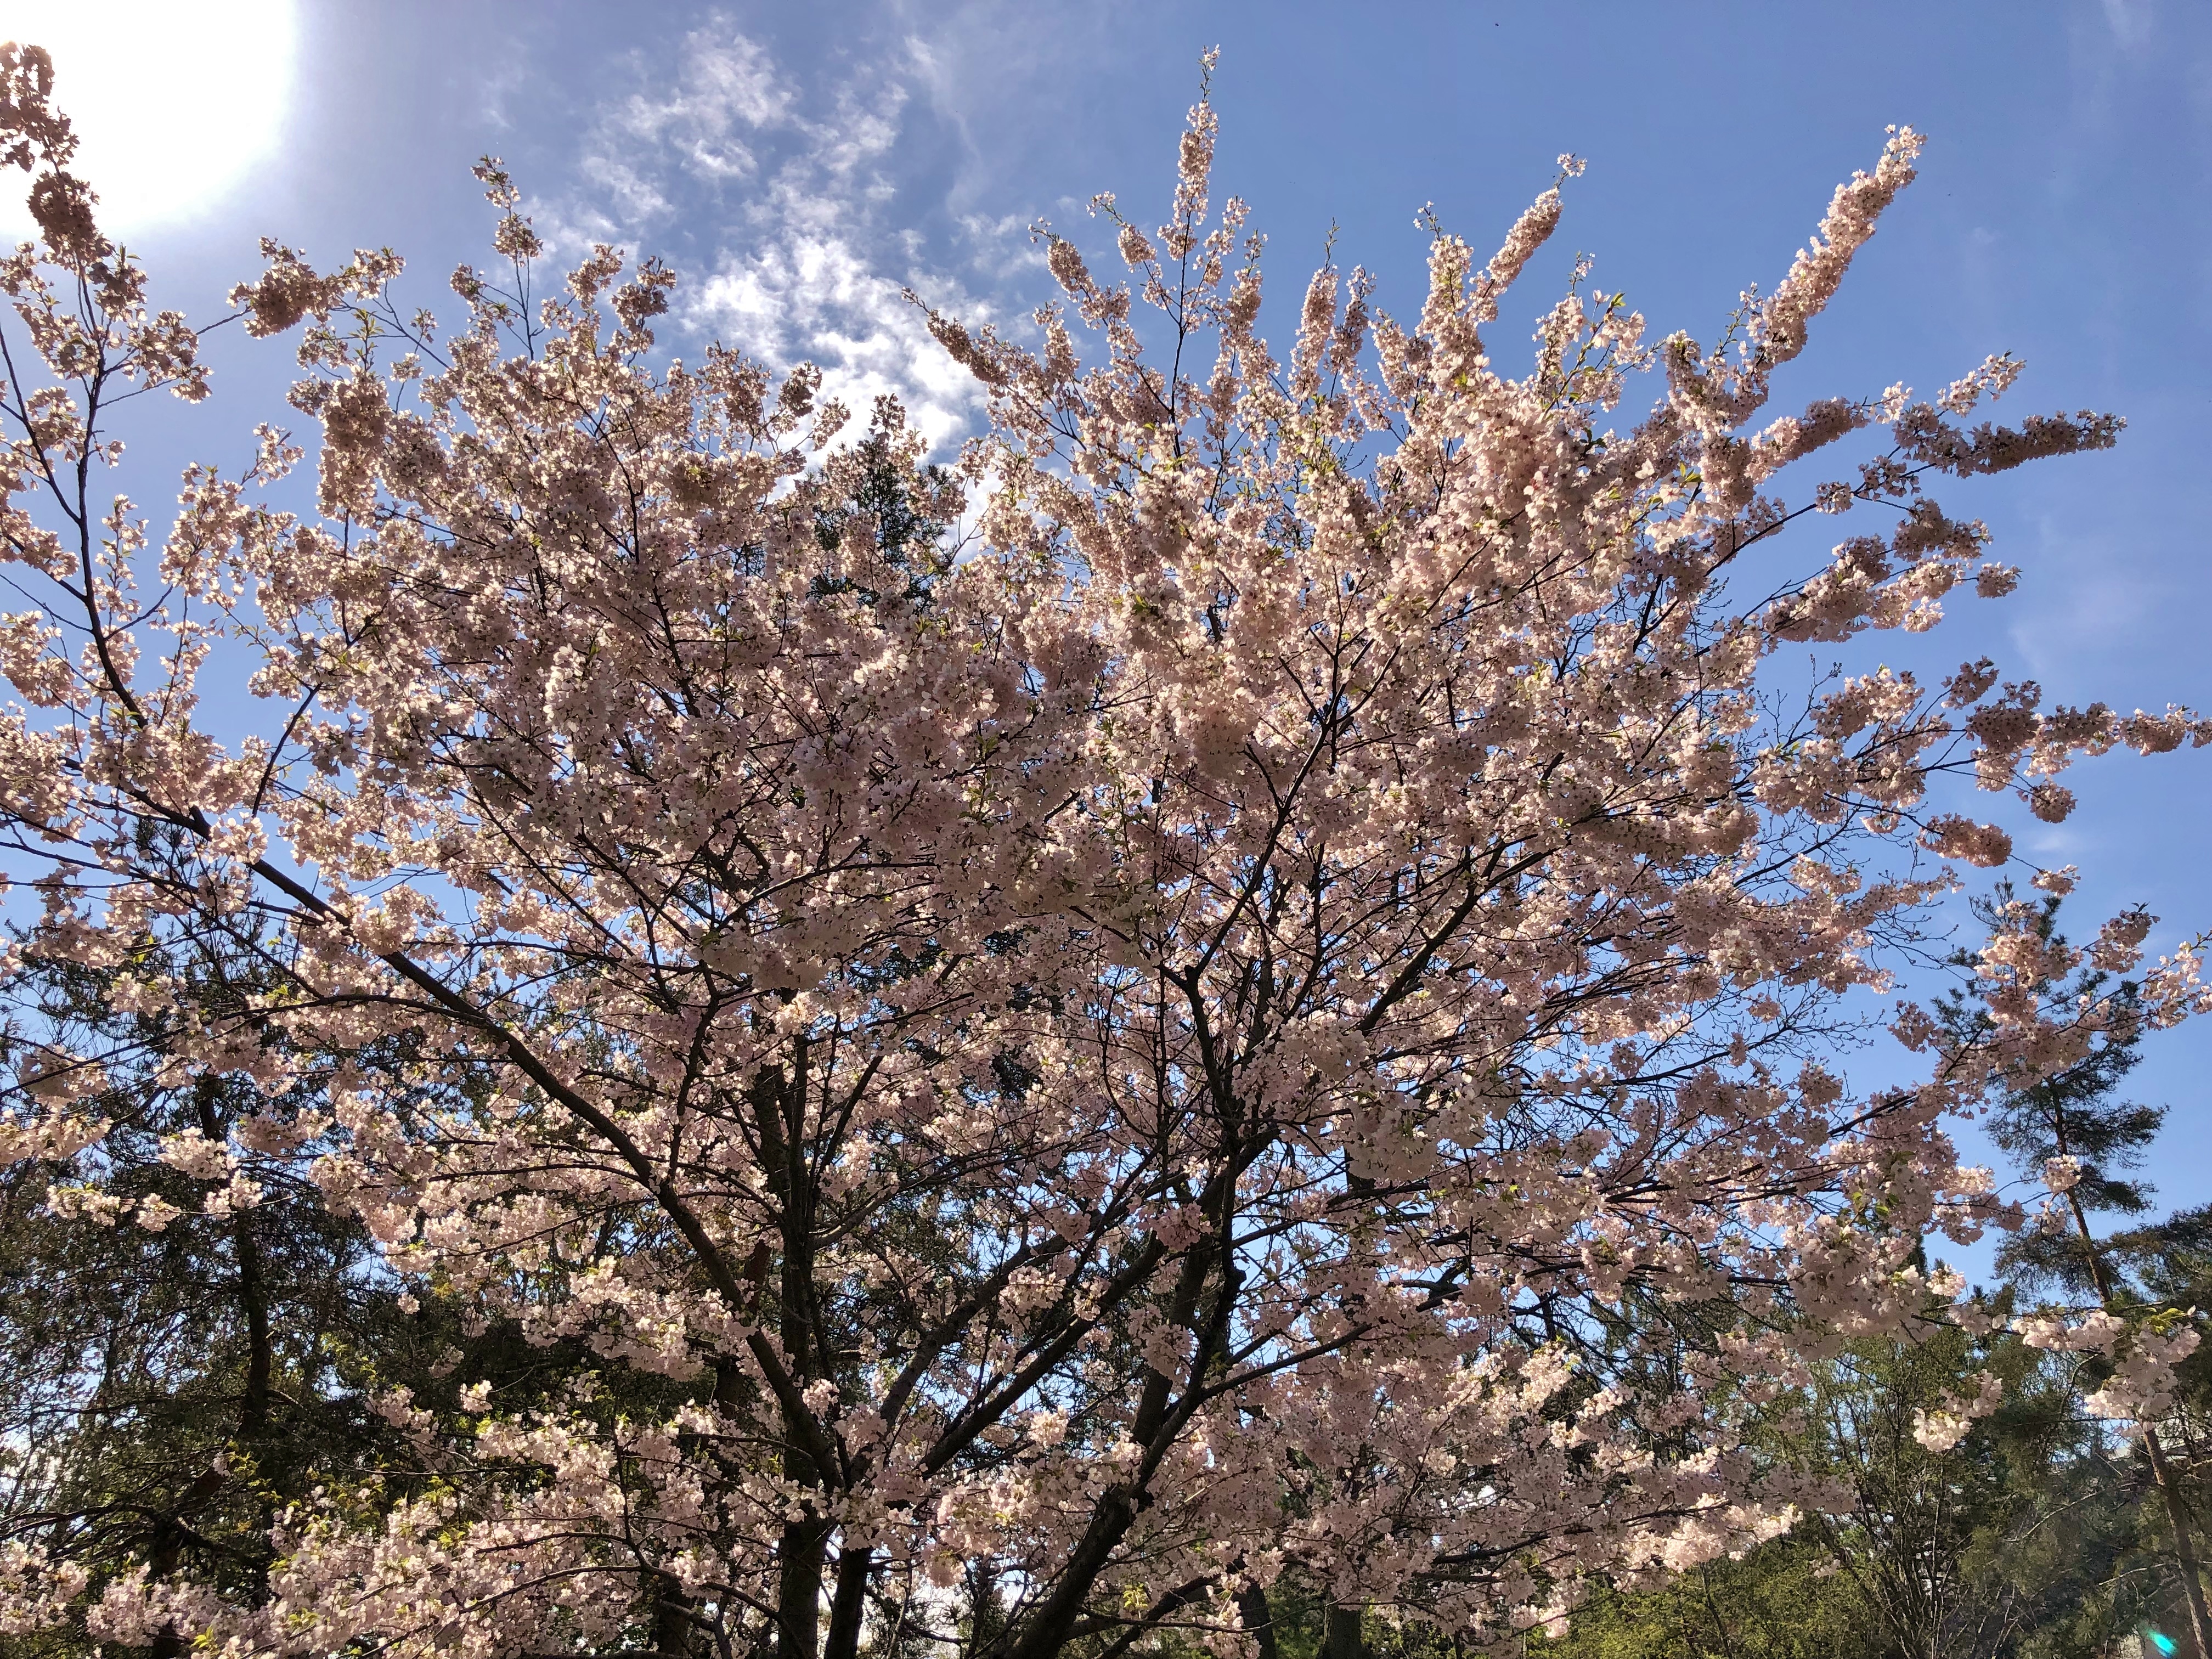
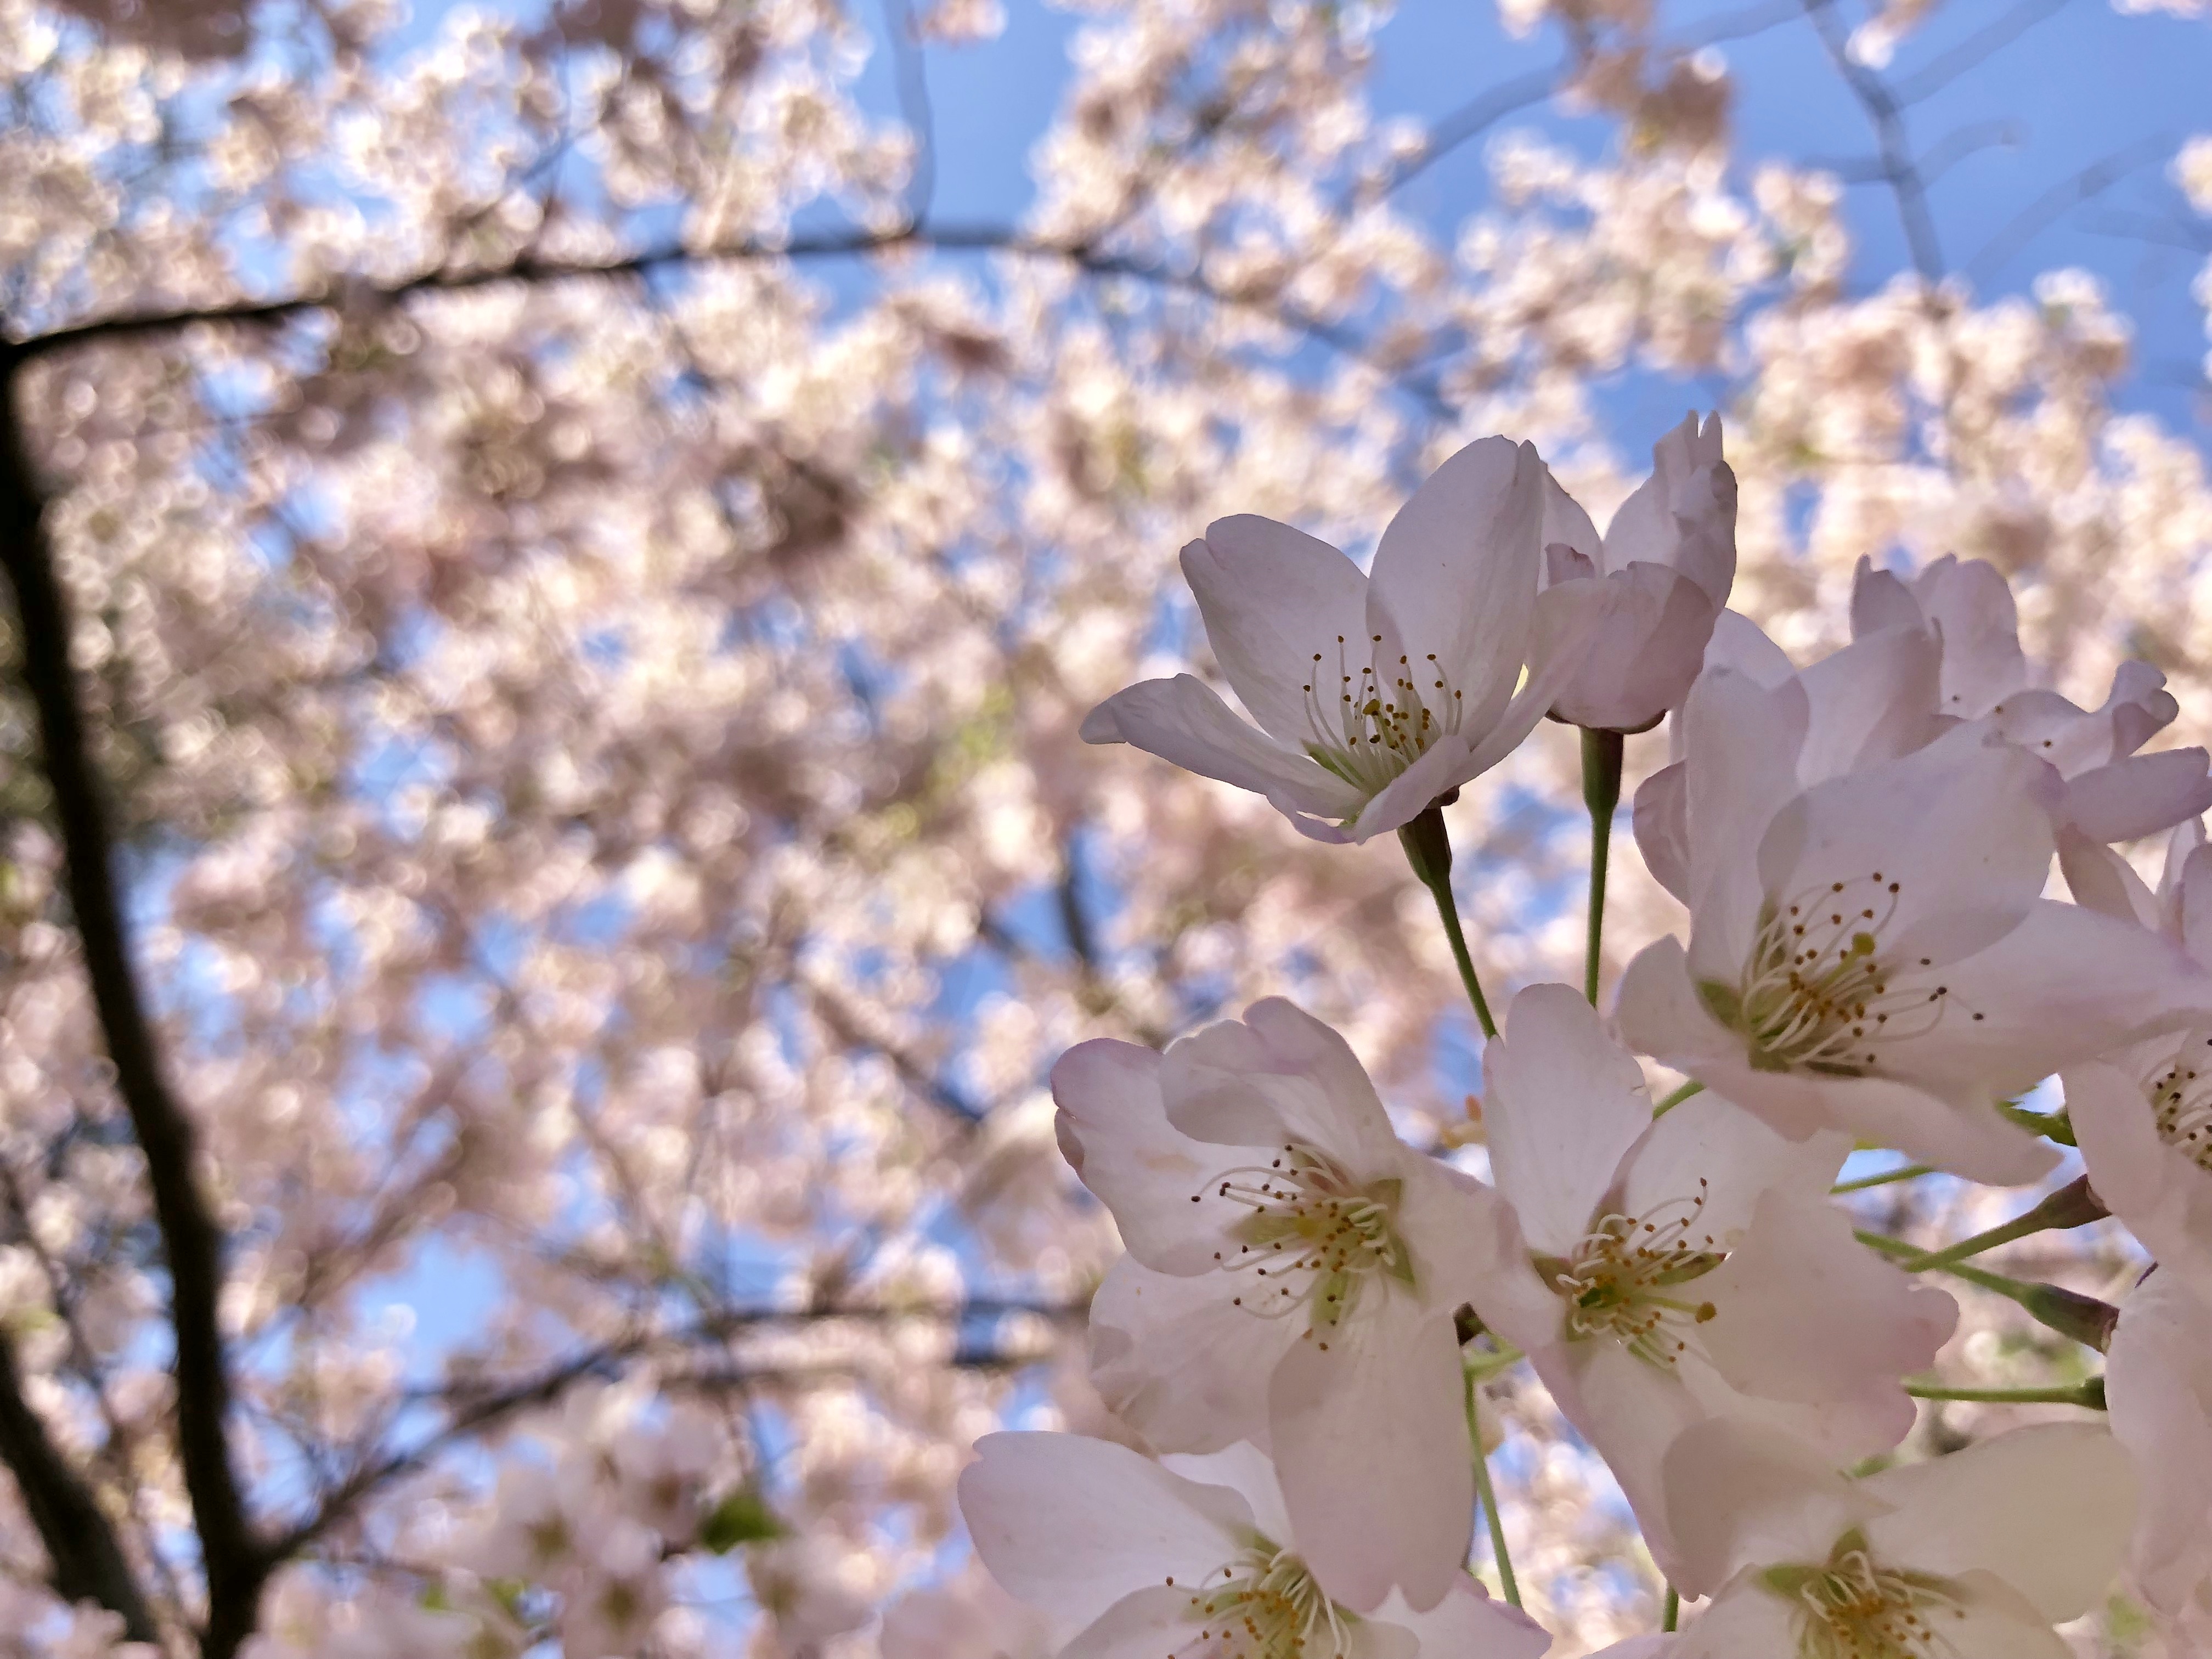
Oh yeah. Another bonus is that, since the Monorail suspended above ground, you get a nice view to look at the whole way in! We had our very first ever glimpses of cherry blossoms while riding on the Monorail during our trip in 2015. You definitely don’t get that while underground on the Keikyu line.
the first time we saw sakura in real life
Everyone values different things for what constitutes as the best options for transportation but the frequency, proximity of both departure and arrival, price, and space make the Tokyo Monorail our preferred method of reaching central Tokyo. That’s our recommendation but you’ll have to decide for yourself which way works the best for you.
Here are the 20 STEPS you need to do to make your dream a reality:
(This post will be cleaned up and beautified at a later time. We ourselves are leaving on our epic journey in less than a week and it’s been a bit hectic! I wanted to at least get this online beforehand but it’s missing all the pretty pictures. All the info is here but come back in a few months and it will be even better!)
*The videos don’t have all the information that is here on the blog. Keep reading!
Step 1:
Decide on the purpose of your trip.
Are you into the unique fashion trends in Japan? Are you obsessed with anime and manga? Are you interested in the traditional culture of Japan? Are you a washoku (Japanese cuisine) foodie? Are you going to shop? To party? Or do you want the smorgasbord experience and try a bit of everything? (For me personally, I am ALL ABOUT all things Japanese so we’ll be doing it all.)
Step 2:
Decide how long you want to go for.
Are you going for a quick trip or an extended stay? Your budget will impact this decision, of course.
Other factors might be how much time you have off from work or school and personal relationship responsibilities (like kids or spouses – Can you be away long? Are they coming with you? How does their time off impact the timing? Etc.)
How much activity are you trying to pack in? Will you be travelling around the country (something that eats up time) or staying in one place?
These are just some examples of things you need to ask yourself.
There are also various visa requirements, depending on which country you are coming from.
Japan has an agreement with 68 countries for a “visa exemption”, meaning you don’t have to apply. You just go through customs when you arrive, with your passport, and they give you a short-term stay visitor’s stamp.
For most of these countries, a Visitor Visa is for 90 days (30 for United Arab Emirates, 15 for Thailand and Brunei). List of countries Official criteria for Canadians
You can get 2 Visitor Visas in the period of 1 year. As in, you can’t spend more than 6 months total in Japan without a work visa.
For anything longer or countries not on that list, you need to apply for a work visa. In most (all???) cases, you need to have pre-arranged employment in Japan AND a 4-year university degree to get one. (Which is why I never moved there! I only graduated from college with a 2-year diploma.)
Japan also has a mutual agreement for a Working Holiday Visa with 23 countries which allows citizens between the ages of 18-30 (sometimes 25) to stay in Japan for one year and work part time.
The employment needs to be secured before the visa will be issued. (Proving the offer of employment is part of the application process.)
Sorry, American friends. This doesn’t apply to you since the United States is not one of those countries. List of countries Official criteria for Canadians Note: You can only get ONE Working Holiday Visa in your lifetime.
Step 3:
Pick a time of year for your trip.
Seasonality is a big aspect of Japanese culture. I like to say that each time of year has their own festivals, food and flowers.
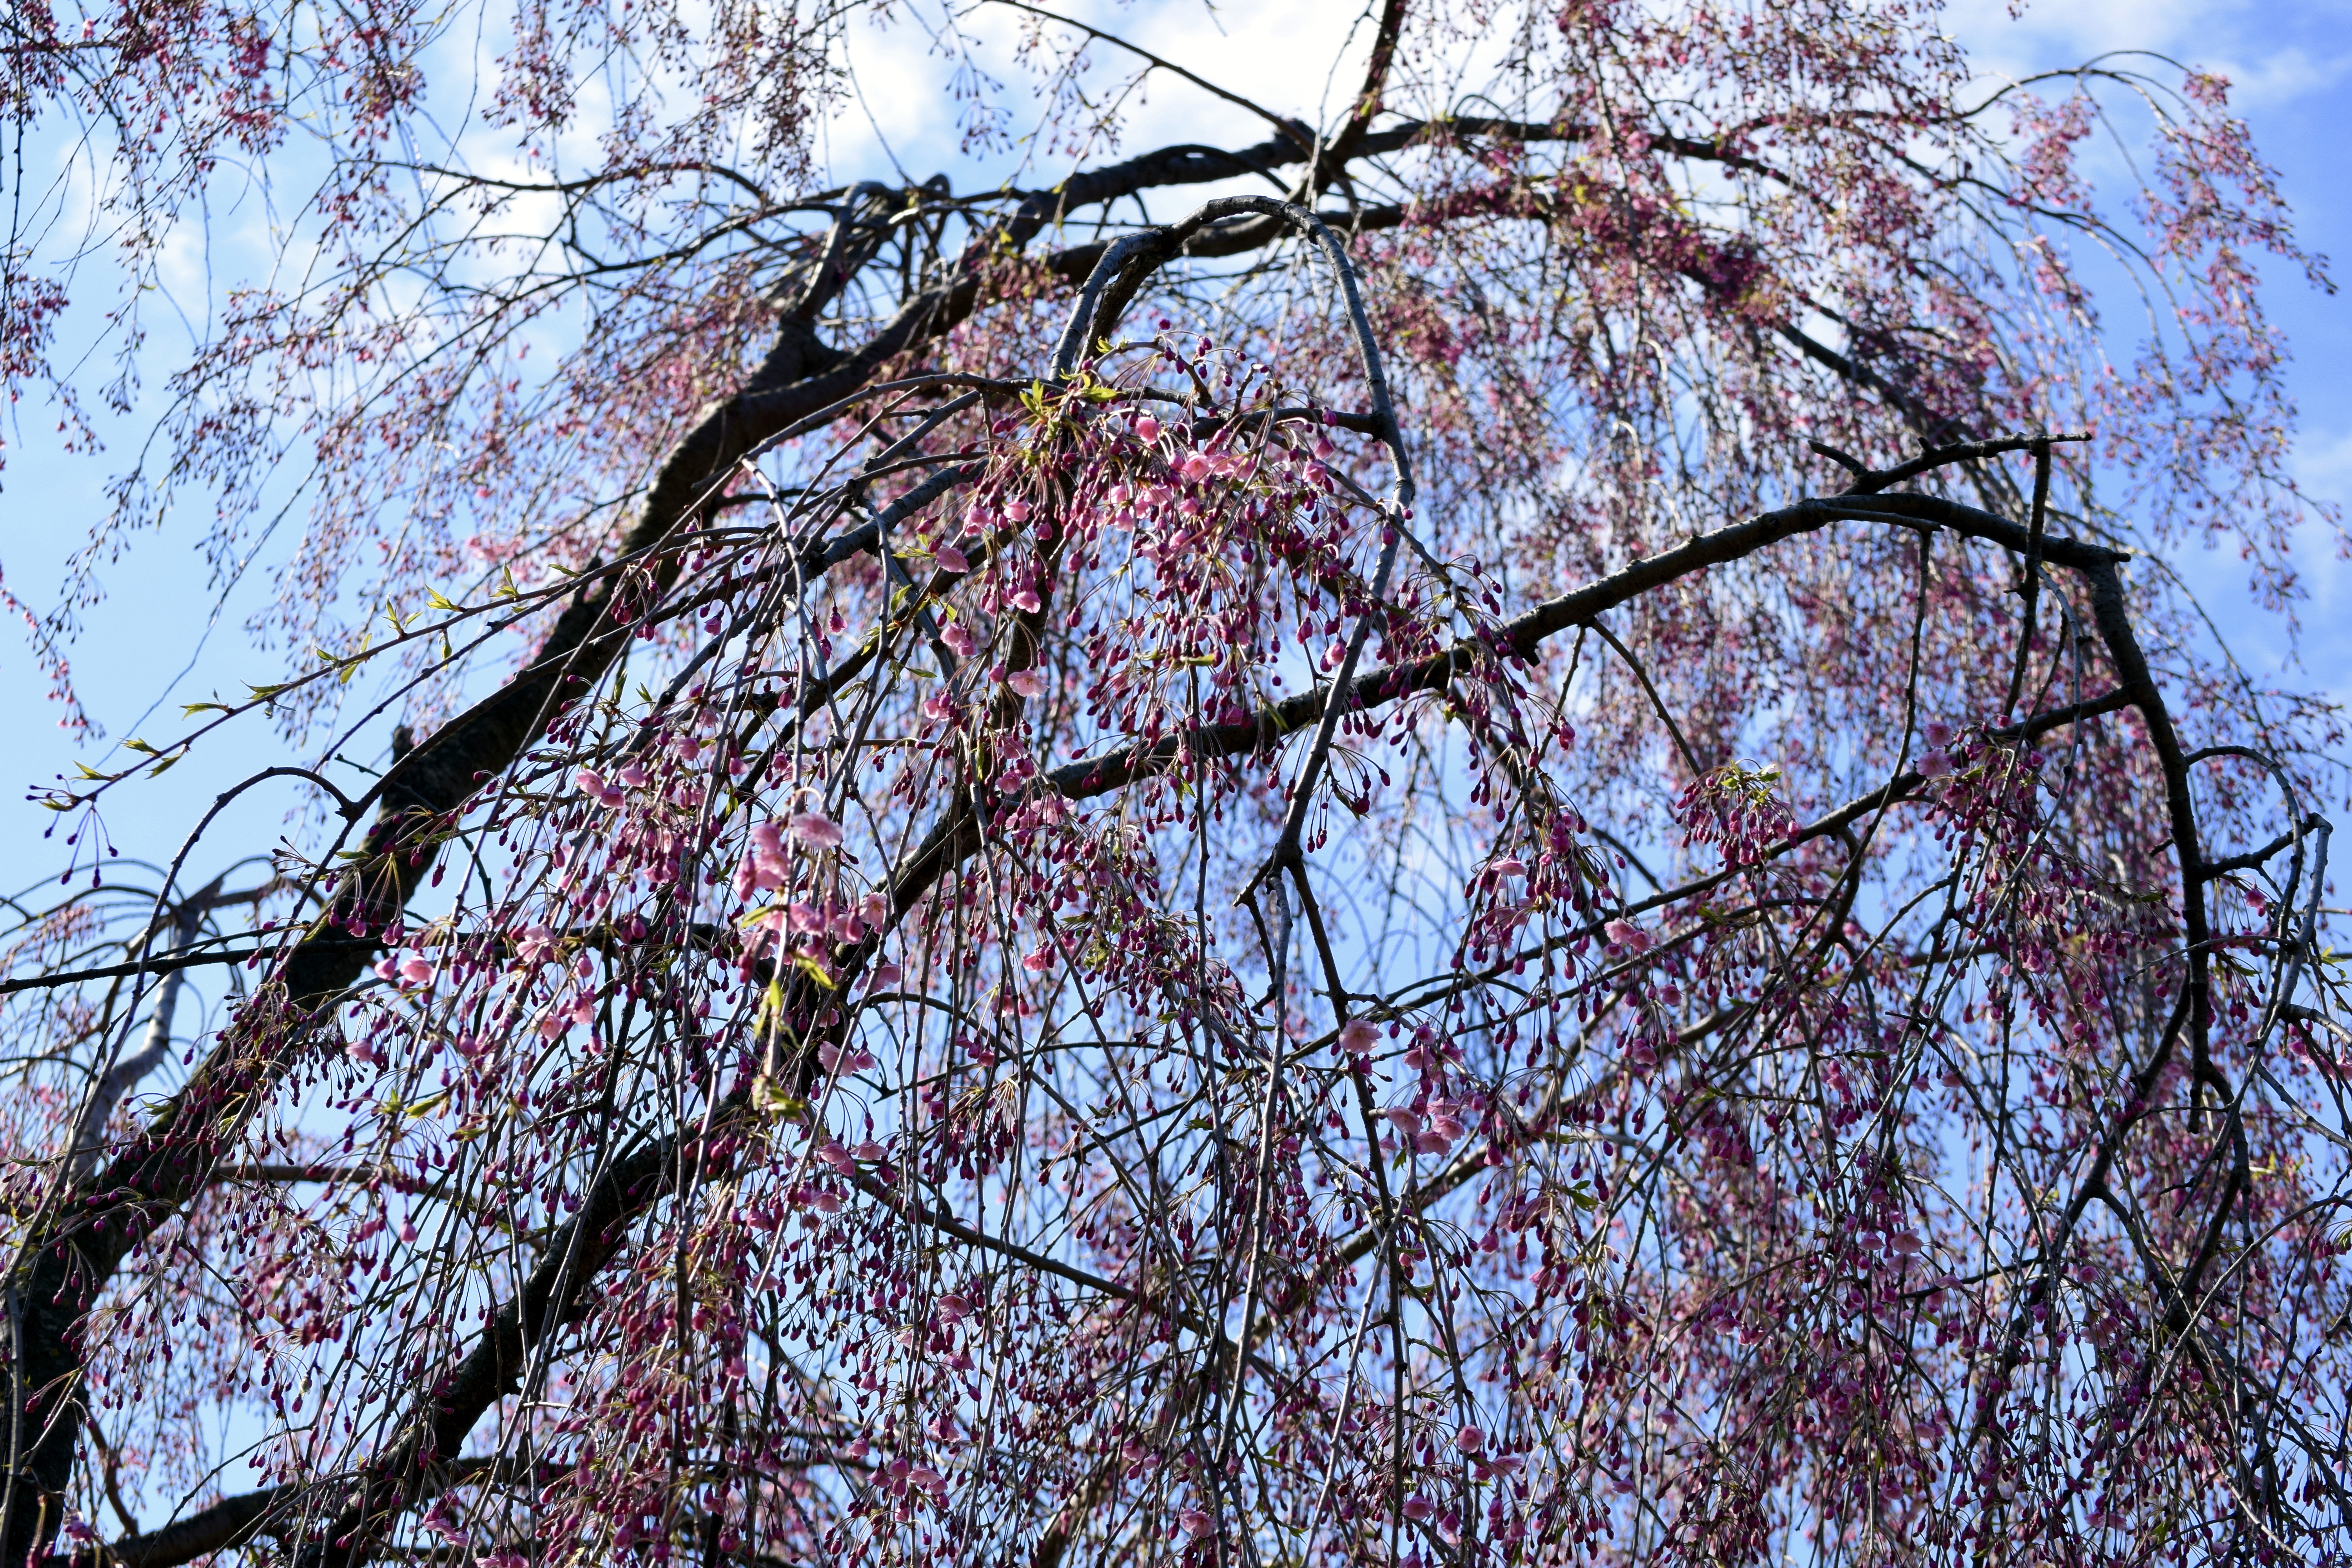
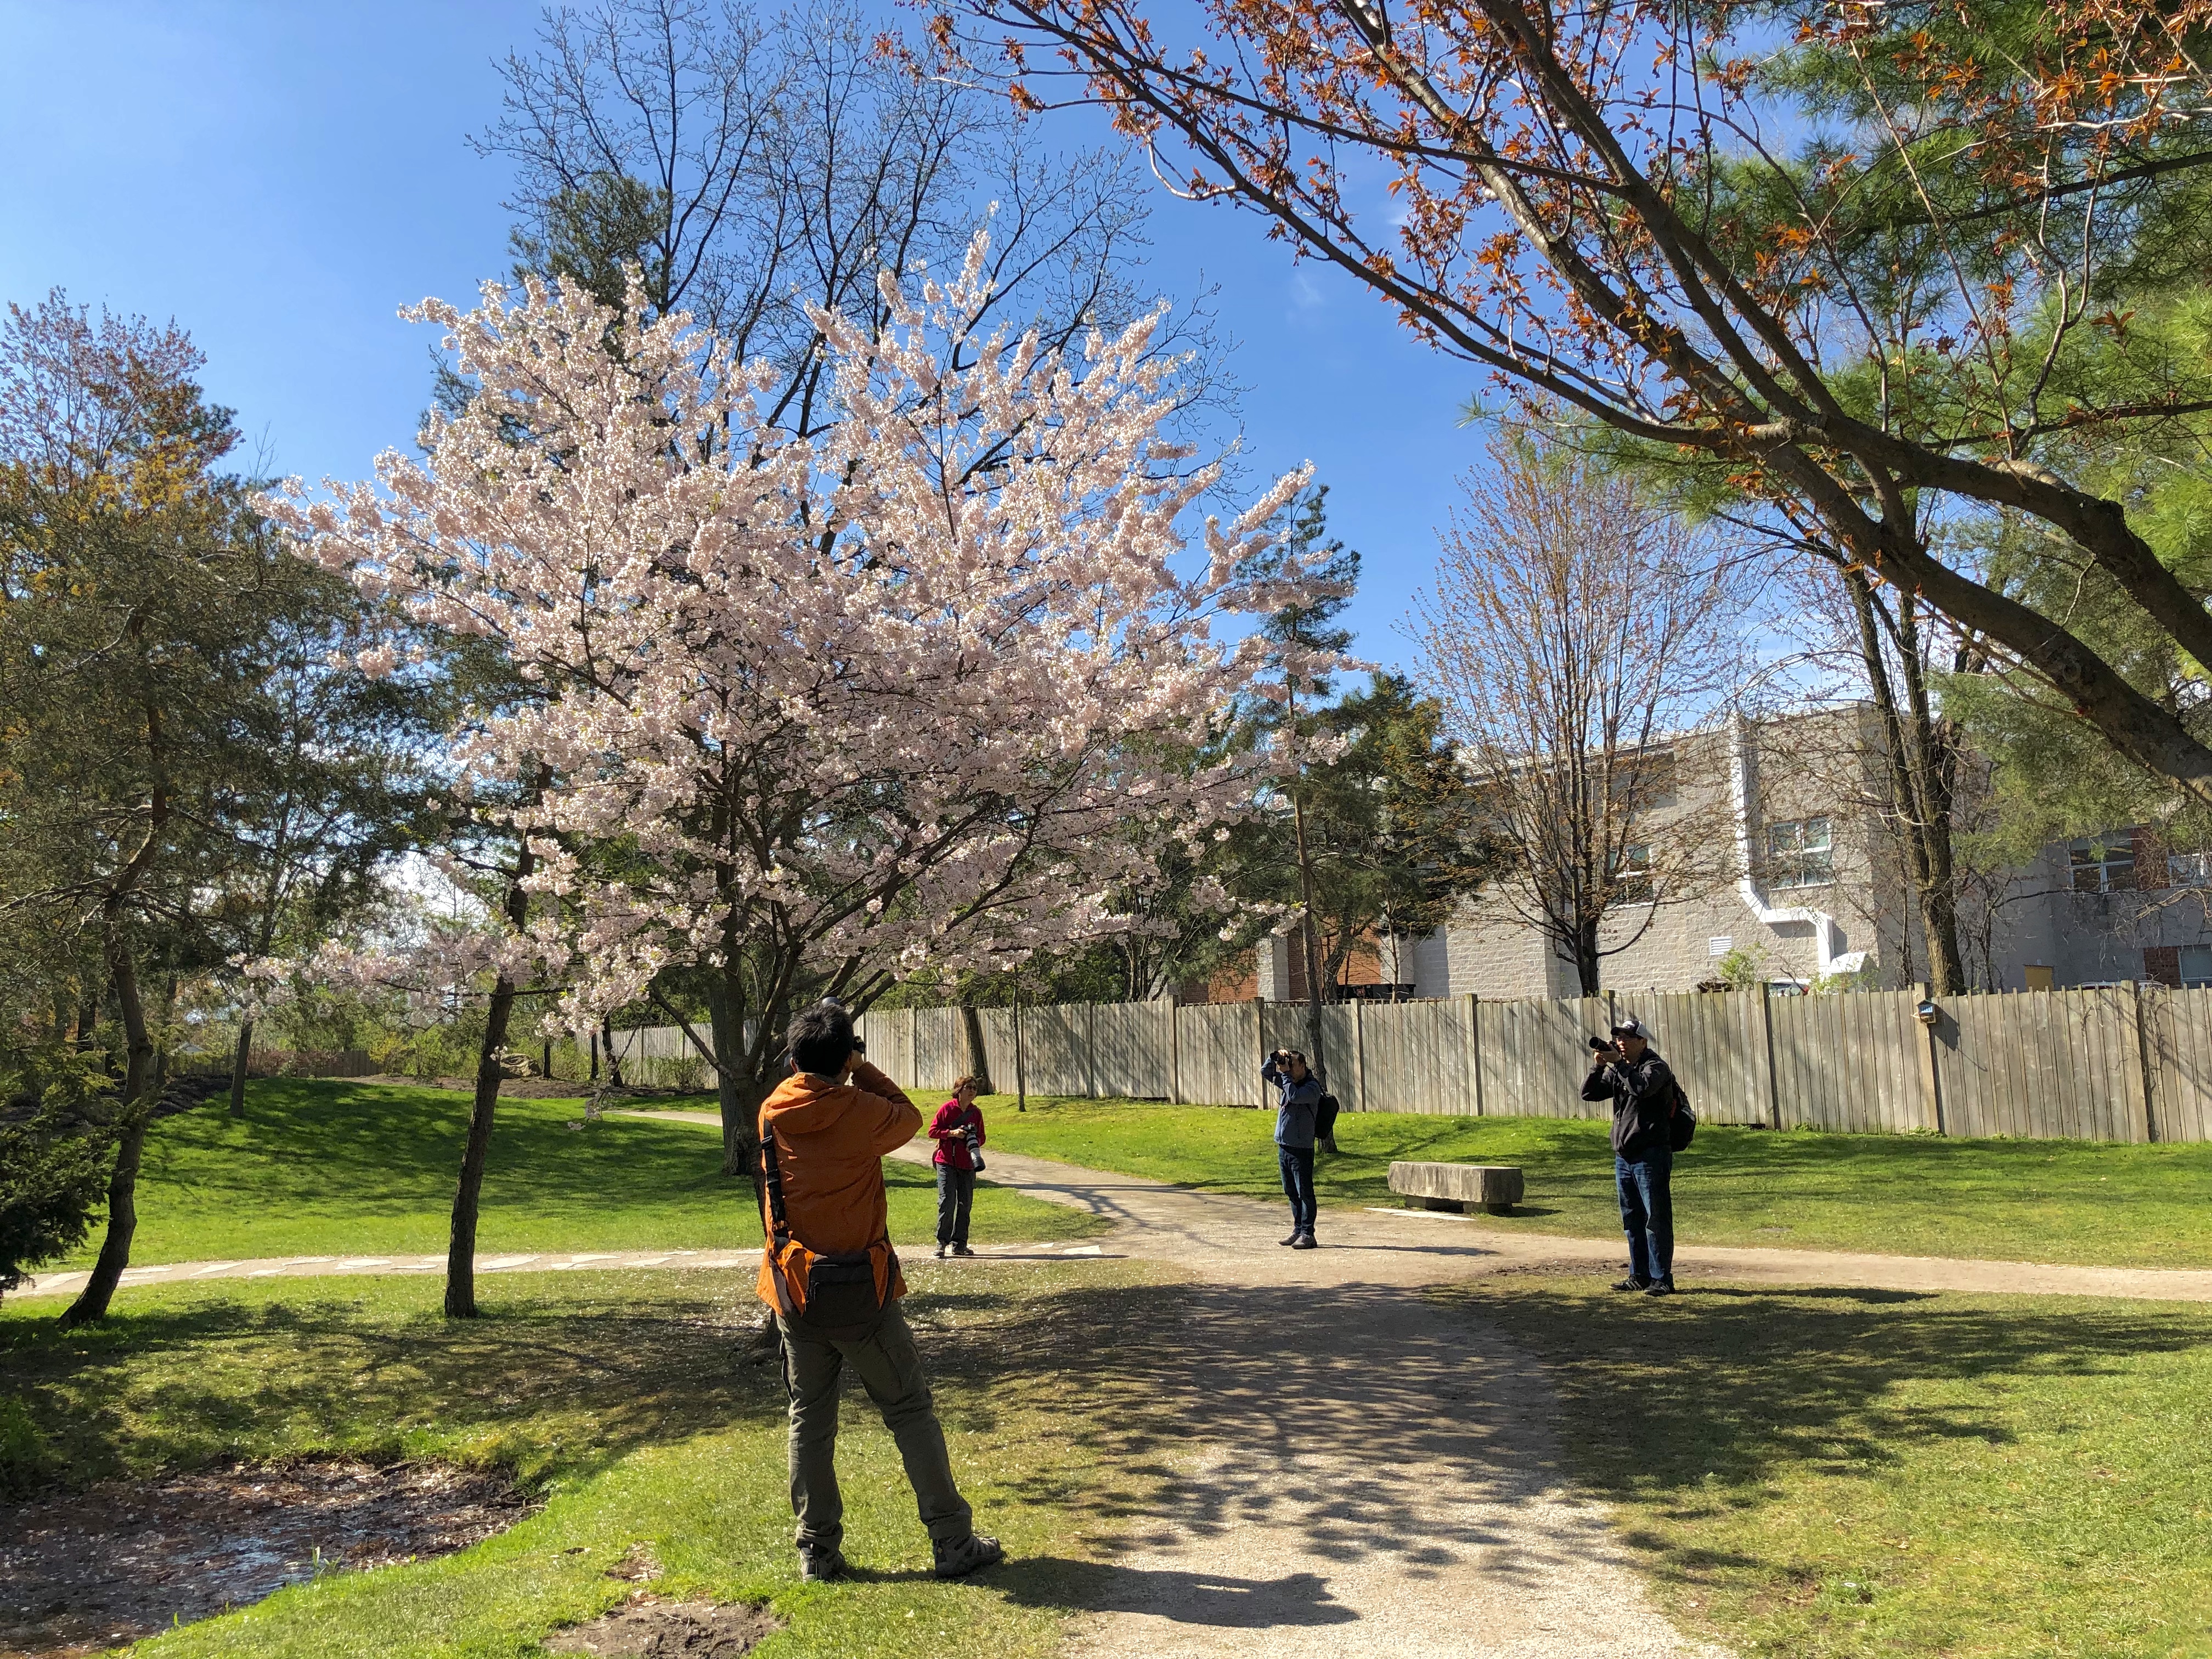
Obviously, cherry blossom season (hanami) is famous and one of the busiest times of the year but also arguably the most beautiful.
Each season has its own unique draw. Do a little bit of research and if you come across something seasonal in particular you really want to do, plan to go at the time of year when it occurs.
Obviously, there are pros and cons of travelling during each season. As mentioned, hanami is THE time most first-time visitors to Japan aim for. The first thing to consider for that is that the weather has an effect on when exactly the sakura will be in bloom. It’s generally the end of March/early April but only lasts a week or two so it can be difficult to predict in advance.
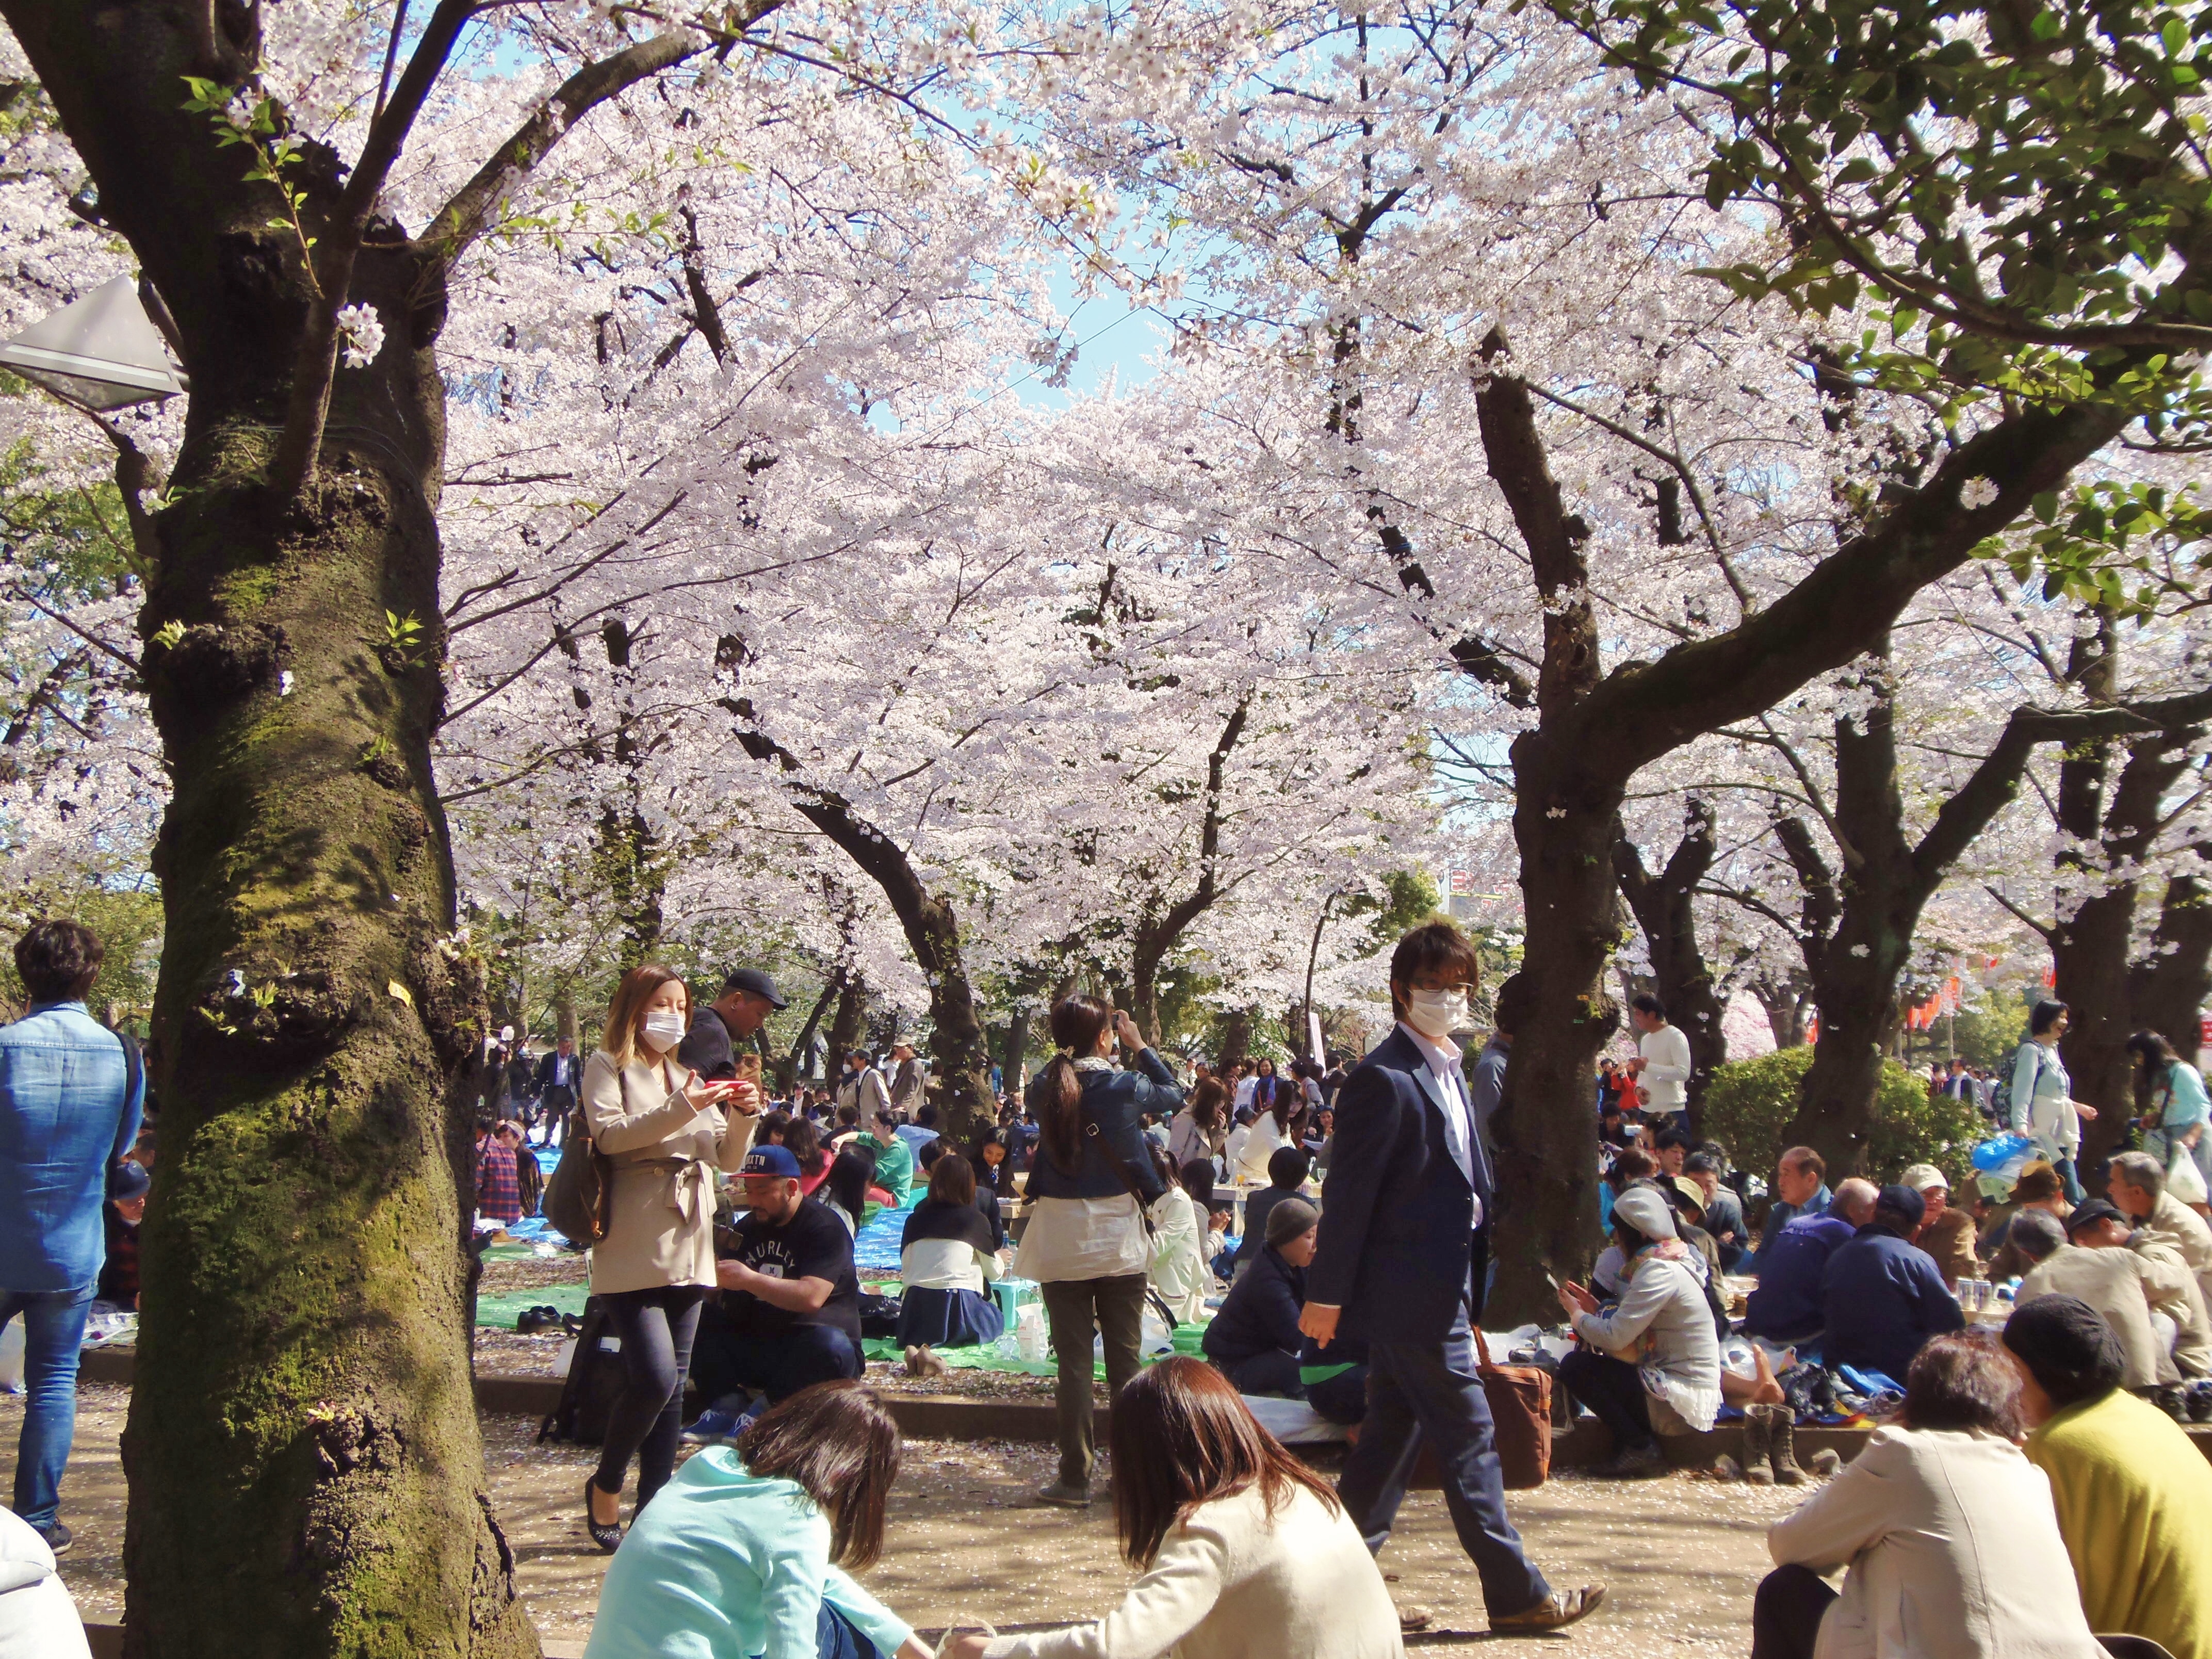
The second thing to keep in mind for planning your trip during peak blossom time is that it’s one of the busiest times of the year for tourism. Not only do all the foreign tourist want to soak up the ethereal atmosphere, but so do all the residents of Japan themselves. Every place you go to will be crowded. Wait times will increase. If this is something that spoils things for you, consider going at a different time.
Other very busy times are Golden Week (last few days in April, first 5 days of May) when everyone is off work; O-Bon (over several days in mid-August) when people visit their families and hometowns; kōyō season (viewing the autumn colours) (which is precisely when we are going this time around!) – like a slightly lower-grade hanami, especially in areas known for beautiful leaves, like Kyoto; and the period around the New Year.
Weather is another thing to consider. Rainy season is mid-June to mid-July, summers are (IMO, insufferably) hot and humid, typhoon season is end of summer/early autumn, etc. Winters are generally mild in the urban areas and further south but in the north and in mountainous areas, snowfall can be intense.
Japan is a very beautiful country and any time in would be a great time to visit and will have a lot to offer. It’s a matter of figuring out what you want to see and experience and what you’re not comfortable with.
Step 4:
Decide on your destinations.
If you’re going to be travelling around within Japan, make a list of the places you want to see and prioritize them. See what you can realistically do in the time you have allotted. Remember to factor in the time it takes to get from place to place. On the map, Japan doesn’t look very big but it takes roughly 10-12 hours on the Shinkansen to get from Tokyo, which is fairly centrally located, up to Sapporo in Hokkaido or down to Fukuoka. Domestic flights are also an option, which cuts the time but increases the cost. (In some cases though, there are great deals for flights that are cheaper than Shinkansen travel. If you DO NOT have a JR pass, this can be a great option.)
Or are you simply going to arrive in one city and stay there the entire time? I personally could spend an entire year in Tokyo alone and not have enough time to see everything I want.
Once you have that decided, work out your basic itinerary. What are your “must see” spots in each place? Make lists – places you want to see, food you want to eat, things you want to buy, experiences you want to try. (Pictures you want to take? Haha.) Tip: Don’t over schedule yourself. Leave at least some free time to explore your surroundings. Many people say their favourite memories are when they got lost and spent time just wandering around, discovering hidden places they would have missed otherwise.
Work out a general budget of how much you’re going to need to fund your trip.
A quick mini list of things you’ll be spending money on:
-airfare
-insurance
-accommodations
-transportation
-food
-Internet connection (WiFi or SIM)
-admissions – including donations and ‘prayers’
-purchases/souvenirs
Think about what things you want to do cheaply and what you’re okay with splurging on.
Transportation costs include your JR pass and IC card. Will you be staying in a place where you can cook your own food (AirBNB, hostel, or sharehouse)? Many places, as anywhere in the world, can have expensive admission – like Universal Studios and Disney parks, SkyTree and Tokyo Tower – but smaller spots can add up quickly as well. For example, temples and shrines usually have a few hundred yen for an entry fee and then there are the ‘side purchases’ you will inevitably make within them like ‘prayers’ (coin box donation, omamori (charms), ema (wish boards), omikuji (paper fortunes)).
Once you have that totalled and have a general idea, start putting aside money specifically for your trip. Don’t touch it!
A few tips for saving up some cash (for travel or anything, really):
-start a separate account and deposit chunks when you can or a certain percentage from each time you’re paid
-make those necessary sacrifices! (No travel, no eating out, …no fun – Haha)
-pick up some more shifts at work, overtime, or get another side job (I’ve used craft making on Etsy to pad travel funds in the past.)
-if you have a birthday coming up, ask for donations to your fund instead of presents
Step 6:
Book your flight.
In Canada, we don’t have many options for airlines. Of the two major ones, only Air Canada flies to Japan. (WestJet does not.) We went with Air Canada because it was the only direct flight option into Tokyo (and because we had a discount coupon to use due to a previous mix-up). However, if you don’t mind stopovers in other places (such as Korea or China), you can find flights much cheaper.
You can sign up for alerts for when certain airlines have seat sales to Asia. Some travel agents will be able to give you cheaper airfare when you combine with tour packages. Other than that, monitor your favourite airlines websites for a period of time to see when prices drop. Tip: Use incognito browsing. We noticed that when we kept checking on certain dates, all of a sudden JUST those dates increased and never went back down again. Somehow, they track that data and scam you! Haha. (Really, I don’t know how it works but that seems to be the case and by using an anonymous browser, you can avoid it apparently. I heard that tip from someone else after we had already made that mistake.)
If you are flying directly into Osaka or Fukuoka or Sapporo, etc., prices might be less. Consider that option if you are going to be travelling around or not going to Tokyo at all.
If you are flying into Tokyo, we highly recommend that you arrive at Haneda airport rather than Narita, if you can. Haneda is more convenient. (More about that later…)
Step 7:
Purchase some travel insurance.
Every single other person on YouTube expounded the necessity for insurance. They accompanied their pleas with horror stories…
Confession: We have never purchased insurance. BUT that’s because a certain amount is built in to our credit card agreement. We’ve even made use of it before to replace necessary items when our luggage was delayed (at home, not in Japan).
Look into that option to see if your agreement has that too but if not or you want extra coverage, by all means, do it.
Keep in mind, Japan is a natural disaster prone area. Things happen. Be safe and be prepared.
Step 8:
Make sure you’re healthy.
If you’re a worrier or in poor general health, you may want to get your doctor’s all clear before you travel. Many people ask about what vaccinations are needed for travel to Japan. It’s not like travelling to a nation that isn’t “first world”. For the most part, the vaccinations necessary for Japan are the same that are necessary for here, so we already have them. (MMR, polio, etc.)
Some sites (mainly pharmaceutical companies) will suggest that you get a vaccination for Japanese Encephalitis – a virus carried by mosquitoes. It’s really rare, similar to contracting West Nile here, BUT it’s also 100% preventable with the vaccine. If you want to cover all your bases get that one too, go for it.
Step 9:
Book your accommodations.
What seems like either (or both) the most daunting or the most boring task in planning your Japan trip – figuring out where to stay – is actually pretty interesting. There are a lot of options! Some of them… very unique, to say the least.
You can use the same hotel booking sites you normally use for most of these options. (Booking, Trivago, Hotels, Expedia, Travelocity, etc.) Once you find a place you like, look it up on as many of these as possible to find the best rate.
You can also use the site JAPANiCAN but, in our experience, they are better for only the places that aren’t available to book on the regular sites, such as Japanese style inns. (Otherwise, their rates don’t seem to be as good.) Japanese Guesthouses is a service that can book remote or virtually unknown places on your behalf. Small, family run, bed and breakfast type places, for instance. These places will often only accept bookings over the phone and if you don’t speak Japanese, this might be your only option. We used them for two of our bookings and it was simple and fast.
Option 1 – regular hotel
Same as anywhere else in the world, if not just a bit more expensive. When you walk into the ubiquitous standard hotel room, you could be anywhere in the world. You don’t even know you’re in Japan (until you look out the window or turn on the TV or call room service). They look the same. They have the same amenities. If you’re someone who likes to stay in their comfort zone of what they have available to them at home, this is your best bet. But you also won’t experience anything world-view shifting here. (Service in Japan is impeccable though, so maybe that’s something new.)
As with anywhere else, prices range from around $100 a night to several hundreds.
Option 2 – business hotel
Originally designed to accommodate business men who needed a basic, no-nonsense place to stay on business trips or who needed a place to crash after missing the last train home, the aptly-named business hotel is a good option for those that still like their privacy – you still have your own room and bathroom – but want to save a bit of money. They are slightly cheaper than their bigger, more ‘fully-loaded’ counterparts. You only get what you absolutely need – a clean room… and WiFi. You don’t NEED space! The rooms can be quite small. (I saw a video once – can’t find it anymore – where an averagely tall American man stretched out his arms and one leg and could touch 3 walls at once.)
Business hotels generally range from about $70-$110 per night.
Option 3 – ryokan Staying at a Japanese-style traditional inn is on many traveller’s bucket lists (and should be on yours too!). Before western influence overtook the hotel scene, this is where Japanese people laid their heads at night when not at home. It’s a great option for “the Japanese experience” – something you can’t do anywhere else. The room will be covered in tatami (grass mat) flooring and, when you arrive, there won’t be a bed visible. While you’re eating your included traditional multi-course meal in the dining room or off soaking away your fatigue in the ryokan’s onsen (hot spring bath), fast and efficient staff will come into your room and make up your futon (floor mattress) for the night. Japanese breakfast is often also provided.
Many rooms don’t have their own shower facilities so bathing is done in a shared area. Beware if that’s not your thing. (Many foreigners have to get used to the idea but love it once they try it.) Tip: Bring a towel since many smaller places don’t provide them or do only at a charge.
Ryokan can range from reasonable to extremely expensive. Note: Ryokan usually charge PER PERSON (since dinner and breakfast is most often included) so look for that when checking prices.
(*From here, the numbering differs from our video.)
Option 4 – AirBNB
Before June 2018, there was a plethora of available AirBNB rentals in Japan. Then they passed a new licensing law which made it more difficult for owners and many of them disappeared. Before, prices were extremely competitive and you could find decent places for less than $30 per night. After, the locations that were left increased their prices to reflect the demand. It can still be more cost effective than a hotel, especially if you stay for multiple days. (The cleaning fee is the same whether you stay 1 night or 7, for example.) They can be great for families since it can be difficult finding a hotel to accommodate more than 2 people.
AirBNB rentals are people’s homes so this is a place where you can “live like a local”. They are often located in quiet neighbourhoods.
Prices can vary drastically. You can still find inexpensive, basic locations or ones that are fancy or special in some way for a lot more.
Option 5 – hostel
Anywhere else in the world, when the image of a hostel is brought to mind, we think cheap but kind of gross. Probably not very clean. Crowded, loud, and maybe not even safe. Hostels in Japan aren’t like that. They are usually quite clean and safe. You still have to share space (dormitory bunk bed style bedrooms, shared kitchen and washrooms) but the difference in price makes up for it. Many hostels have unique selling points that make them attractive options as well. For instance, we have 2 booked – one in a converted junior high school where you sleep in the old classrooms, and one in a 100 year old traditional house with a Japanese garden.
If you’re a social person, hostels can be great options to meet people from all over the world. If you’re more private, this could be a downside.
Like ryokan, beds are reserved per person so it’s a great option for solo travellers looking to save money. Prices can range from $20-$60ish per night.
Option 6 – sharehouse
Similar to hostels, where you share a kitchen and bathroom area, sharehouses are a trend on the rise in Japan. Depending on the place, sometimes you have a private room, sometimes you have a roommate, sometimes it’s dormitory rooms. It’s a much cheaper option than hotels and you often get discounts when you stay more than a couple months. A fantastic option for a solo traveller and for people who plan to stay for longer periods. Couples can still rent sharehouses but, be forewarned, double beds are really rare. Another good place to be social and make new friends.
Sharehouses can be as cheap as $20 a night. Some of the newer style ones are more ‘fancy’ and are more expensive but offer some impressive facilities.
We have booked our time in Tokyo in a Japanese apartment offered by a sharehouse company – so that’s also an option. In that case, you don’t share space. You have your own kitchen and bathroom. It’s another unique experience where you can live like a local for a relatively short time.
Sharehouse apartments can be a lifesaver to someone moving to Japan from a foreign country. Renting an apartment can be very difficult and expensive. There is something called reikin, or “key money”, where you could be paying almost a full month’s rent worth to the landlord as a “gift”. It isn’t a deposit – you don’t get it back. In the sharehouse system, there is no reikin. Apartments also usually come fully furnished and even have dishes to use. WiFi is included as well.
Depending on many factors (size, age, location), prices vary but our apartment comes to around $50 a night.
Prices are per person (or bed) but the subsequent guests are at a much lower cost.
Option 7 – minshuku
A “homestay” is a bed or room in someone’s home. Depending on the owner’s style, it can be thought of as a bed and breakfast or as a boarding house. It can be either several rooms in someone’s home that they rent out regularly to guests coming and going for a few nights each or it can be for one single person, almost like a foster family. Many (if not all) foreign exchange students are placed in a homestay.
For the bed and breakfast style, meals are often included and usually something about the building or area has some interesting selling point. (We’ll be staying at a traditional Japanese farm house up in the mountains.) They are most common in rural areas, although minshuku can be found in cities as well.
Staying at a minshuku is a really good way to immerse yourself in Japanese culture and the local way of life.
Prices vary greatly and are per person.
Option 8 – shukubō Temple lodgings are another very unique experience that you can’t really find elsewhere. Very few temples offer this option. You get to stay overnight and join the monks in their daily practices. The meals served will be shojin ryori (vegetarian Buddhist cuisine) and is often the highlight of the stay.
The style of room is similar to a ryokan – tatami and futon, shared bathing facilities – but don’t expect any modern conveniences like TV or WiFi. You are there to immerse yourself in the atmosphere.
We are spending one night at a shukubō and really looking forward to it.
Prices are moderate and per person.
Option 9 – love hotel
Something that is probably only in Japan – or at least, very different from a similar idea elsewhere – is the love hotel. Originally designed as an anonymous space for couples to find some privacy away from their multi-generational, cramped homes, they have evolved into quirky, hi-tech, wondrous getaways. Guests can enjoy a “stay” for the whole night or a “rest” (a shorter option of a few hours) for quite a bit less money than a regular hotel.
When we think of ‘pay by the hour’ accommodations in other places, we get the idea of somewhere really seedy and probably really dirty. While Japanese love hotels still have a general seedy edge, it’s in the best, most amusing way possible. And they are usually spotless. The rooms themselves are often quite large in comparison to standard hotels (especially the bathrooms!) and have a full complement of interesting features, such as LED lighting schemes, costume rental, and items you can purchase from either a vending-type machine in the room or by calling down to the reception.
Speaking of reception – the lobby is generally dark and almost empty except for a panel display of available rooms and a discreet curtained window where you slide over your money and never see more than the hands of the person on the other side. (And likewise, they don’t see you.) In some case, there is no lobby. You choose your rooms via a touch screen outside and pay through an automated machine in the room. Often, there are 2 sets of stairs – one leading up to the rooms, one for coming back down – so you never run into other guests. (I’ve seen some with individual stairs leading from a compartmentalized parking garage to each room.) You can order room service and food is passed through a prison-style ‘doggie door’.
One very important note is that once you check in and close the door behind you to your room, you are locked in for the night until you check out again. When you think of what a love hotel is for, the reason for this is obvious. It’s to discourage prostitution! You are supposed to enjoy your stay with the person you came with. Tip: Bring food/snacks in with you since you can’t leave to go get anything.
Many love hotel rooms have bizarre themes. I’ve seen mazes and stuffed animals dens and Hello Kitty and nurses and school girls and S&M caves. Basically, if you can think of it, it probably exists. At this point, in my online research, if it has a mundane look, THAT is weird.
Staying at a love hotel can be a fun, crazy night but it can also be a cheaper option for a decent night’s sleep.
Prices vary, around the price of a business hotel. You pay per room, in this case.
Option 10 – capsule hotel
Another “only in Japan” experience (although they have copycats in various places in Asia and Europe now) and another option that was originally intended for business men who had missed the last train home to have a space to drop their heads for a few hours until the trains started up again in the morning.
Capsule hotels are made up of long corridors flanked with literal pods – 1.2m wide x 1m high x 2m long – stacked 2 high (mounted footholds to climb into the top row). There are no doors (roll down curtain only) and amenities within the pods themselves are limited (a light, volume control with headphone jack, TV screen, AC, and a power outlet). The shared bathroom facilities are generally nice and fully stocked with everything you might need (shampoo, conditioner, face wash, razor, etc.). Most have semi-private shower stalls but some have public onsen as well. Lockers are available for your luggage and you are supposed to change out of your clothes and into a provided yukata (casual cotton kimono) and slippers there. There is usually a lounge (with WiFi) where you can grab coffee and vending machine snacks and hang out until you’re ready to sleep.
Typically, they were only for men but some opened up with women-only floors. It’s rare to find one completely co-ed.
Capsule hotels have a futuristic vibe and somewhat cyberpunk look and that is what draws a lot of foreigners eager to try it out.
Newer style capsule hotels have been popping up lately to cater to the gaijin who wish to stay but might be off-put by the bare bones simplicity and lack of space. They have more tech in the pods (larger TVs, full control using a smart phone, etc.) and are quite a bit bigger too. Some of the latest are almost unrecognizable as “capsules” at all, allowing you to stand up inside. These higher-end options are obviously more expensive.
The downside is going to be the noise. Since your capsule doesn’t have a door, you’ll be able to hear the ‘night noises’ of all the other people within close proximity to you. Tip: Bring ear plugs.
If you plan to stay more than one night, most of the time, you have to check out each morning and take all your belongings with you and then return again at night.
My own personal suggestion would be, if the idea of capsule hotels interests you, try out both styles. Get a firsthand sense of how they started and what they have evolved into. Staying at a capsule hotel has been on my bucket list for years, but since we would obviously be separated for the night and had limited time, we haven’t gotten to it yet. Our very last night in Tokyo is not booked yet so I’m trying to convince Jason we should do it!
Price-wise, it’s probably the best option for a solo traveller, but if you’re a couple (or more), it likely works out to about the same as a night in a business hotel. If that’s the case, you’re probably opting for a night in a capsule hotel for the experience rather than for the price.
Basic capsule hotels can be as little as $20 a night but are usually around $40-50.
Option 11 – all night karaoke
In North America, when you go out for karaoke, it’s probably at a bar and you sing in front of everyone. In Japan however, karaoke is a private or friends-only activity where you have a small room with your own karaoke machine, TV screen, and a couple of mics. There is usually a table with booth seating – which in a pinch can do well for a nap. You pay by the hour and rates are often discounted during the day. You can curl up on the bench for a few hours, if needed. Tip: If you’re actually planning on doing this (not just end up there due to no other options), bring a travel pillow and blanket and ear plugs.
Most karaoke halls (usually several floors with many rooms per floor) offer all-you-can-drink fountain drinks and have a food service you can order from – like room service.
Unfortunately, none of the websites seem to have prices listed so I can’t say exactly how much it is right now, but we’ll do some checking when we’re there and I’ll come back an update this.
Option 12 – manga café
Japan takes their manga reading seriously. So much so that there are cafés designated just for that purpose – called manga kissa (mahn-gah kee-sah) in Japanese. They usually stock a respectable size library for you to choose your preferred books. There are seats at desks or private rooms with a chair that recline or a mat on the floor.
They have WiFi and TVs and gaming systems, and sometimes have shower rooms (for a fee) as well.
Like karaoke, you pay by the hour and drinks are free. Oddly, there is often an all-you-can-eat soft serve ice cream machine as well. They are well-known as places to sleep and offer various time packages.
Option 13 – 24 hour restaurant
This should only be considered if you are desperate! Technically, you shouldn’t be taking up space in a restaurant for this purpose, but it happens. McDonald’s and Denny’s are two places you might spy someone catching a few winks. Just make sure you actually purchase something.
Option 14 – overnight bus
Some coach bus lines run service between cities during nighttime hours. While not exactly cheap, if you have to get to somewhere anyway, you may as well save the money you would have spent on a hotel and time by travelling while you sleep. Killing two birds with one stone.
They have relatively comfy seats compared to regular buses and provide a pillow and blanket. The seat will also have a fold down “hood” to shield your eyes. WiFi is usually available.
The bus makes stops once an hour so that can be disruptive.
Price is dependent on distance.
Step 10:
Buy your JR pass.
We have a video all about this (What is it? Why do you want it? How do you get it?). Check it out here.
Step 11:
Buy tickets and admissions.
There are a few things you will want to purchase well in advance of leaving for your trip. Tickets to the Ghibli Museum is one of those. (They go on sale one month in advance and sell out almost immediately.)
All the info you would need to know about that is covered in our video and blog post.
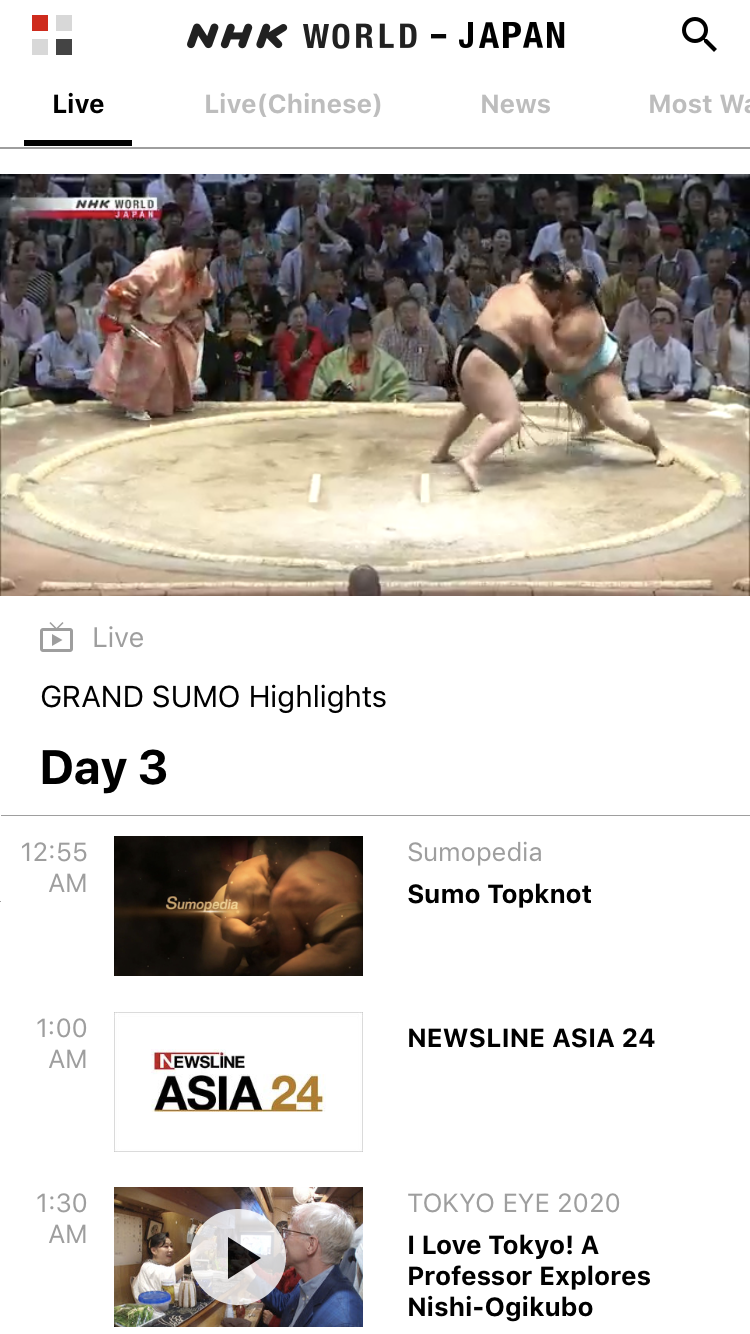
Grand Sumo tournaments are held six times a year – January, May and September in Tokyo, March in Osaka, July in Nagoya, and November in Fukuoka. The best tickets will sell out quickly but you can usually get nosebleeds the day of. If you don’t want to risk it or if you want really great seats, you can buy those ahead of time online too.
For all other major admissions, you can usually wait until at least the day before you want to go there, but if you are planning a shorter trip and don’t have ‘a day before’ for some things, you can also buy tickets for the following online. (These can all be purchased at the door – except USJ – but you run the risk of them being sold out or huge wait times.)
For tickets you buy through a third party ahead of time, such as the Ghibli Museum or sumo tournaments, you will be paying more for that service than if you wait until you arrive in Japan and buy them yourself. It’s up to you whether you think the extra price is worth the peace of mind that you actually have your tickets rather than running the risk that they are sold out.
If you want to participate in any special events, classes or tours, you should sign up for those in advance as well. Examples would include a Japanese food cooking class, an izakaya (small bar) pub crawl/walking tour, watching a sumo practice, etc.
Step 12:
Exchange cash into yen.
A very overused phrase is “Japan is a cash-based society”. While it’s true that Japanese people on the whole prefer to use cash to pay for almost everything, credit and debit cards are used and frequency is on the rise. However, there are going to be some establishments that are still cash only – restaurants and small shops, some small hotels and inns, etc.
A common question is how much money should a person bring on a trip to Japan? That’s really hard to answer. How long are you going for? How much do you want to spend? What are your expenses?
It’s going to take some planning and budgeting on your part to find out how much you’ll need. (Think back to Step 5 and then figure out what things you’ll probably need cash for.) Tip: Always bring more cash than you think you’ll need. You can always exchange unused cash afterwards, but having to take more money out repeatedly will cost you a lot in service fees.
You CAN exchange money while you’re in Japan but you won’t be getting as good of a rate as when you buy it in your home country and you’ll be paying an additional ATM fee for the international usage. You are also at the mercy of that day’s exchange rate which could be higher. Note: Not all Japanese ATMs take foreign cards. (Some don’t even take all Japanese cards!) You will almost always be safe with ATMs at 7-11 convenience stores and post offices (but double check before you leave home that YOUR card will be accepted there). Note: ATM machines in Japan are NOT 24 hours. They shut down after a certain time.
Your best bet is going to be ordering from your personal bank or a currency exchange business in your home country. Shop around to find the cheapest rates and fees. Watch XE.com daily for awhile to see when the basic rate is good. (All services, including your bank, have their own rates but the basic rate sets the bar.) Some places will have a good rate but higher service charges and likewise.
If you are ordering a large amount, leave yourself at least a few weeks in advance. We ordered online from our bank but it took about a week and a half to arrive. Some services, you need to pick it up in person but others will ship it to your house. Tip: For any predetermined large purchases that need to be paid in cash (ryokan, tour group, etc.), set aside that amount in a sealed envelope so you don’t accidentally spend it on something else.
You’ll find that you end up with A LOT of change in Japan. Pay with exact change whenever you can (They love that!) but keep a stash of ¥5 coins (the smaller one with the hole in the middle) to throw into the coin boxes at shrines before making a prayer. ¥5 (pronounced “go en” in Japanese) is lucky. Tip: Bring a coin purse – or buy one when you arrive. Japan is famous for character goods and you can find really cute accessories, like wallets, prolifically throughout Japan. My recommendations of favourite stores for character goods are Kiddyland and Tokyo Station Character Street.)
Get rid of as much of your loose change as you can before leaving Japan. Banks and currency exchange counters will take bills back but you’ll be stuck with the coins.
There are machines called “Pocket Change” in the airports and several other locations where you can dump in your change and charge your Suica/Pasmo card with it or even receive vouchers for places like Amazon and various retailers in your own country!
Quick breakdown of Japanese yen:
-You can think of ¥1 being more or less equal to 1 cent. ¥100, like a dollar, ¥1,000 like 10 dollars. With the current exchange rates though, ¥1,000 is around $9.23 American but about $12.18 Canadian. (¥1,000 = 8.36 euro, 7.29 pounds, 13.59 Australian dollars)
-Coins come in 1, 5, 10, 50, 100, and 500 denominations.
-Compare with America which stops using coins after the quarter (with the exception of the rare “special” silver dollar). Canada has 1 and 2 dollar coins and starts using bills at $5. (Is Canada the only country that has $2 denominations?)
-Japan has no equivalent of a quarter but has a 50 yen coin. (50 cent pieces are a thing of the past in North America.)
-Japan smallest bill is ¥1000. They also come in ¥2,000, ¥5,000, & ¥1,0000. Note: A handful of change can be worth a lot more than you think!)
Sorry that I can’t compare coins and bills with other countries. I don’t know!
Tax Free
Many stores offer duty free for foreign visitors on purchases over ¥5,500 (including tax). You make your purchase at one counter, then take all the items, your receipt and passport to a different counter and they give you a refund. They then staple the receipt into your passport and you are supposed to show that at customs when you arrive home. Some stores will take the tax off the purchase price at the time of initial payment. They will also sometimes package up your purchased items and tape it closed. You aren’t supposed to open it again until you are back in your own country. (If you are consuming something within Japan, you have to pay the tax like everyone else.) Note:Consumption tax in Japan was just raised on October 1st from 8% to 10%. (Just our luck! Ironically (?!), it was last increased just before our last trip as well.)
In one case, you DO want to use your credit card rather than cash. At select Yodobashi Camera stores (an electronics and home good superstore chain), when your purchase comes to over ¥5,000 (before tax) and you pay with your Visa card, you get tax free PLUS and additional 5% discount.
Step 13:
Order a SIM card or pocket WiFi device.
In this day and age, you probably don’t want to be in Japan for very long without a reliable Internet connection. Your hotel probably has WiFi, but what about when you’re out exploring? Public WiFi is available at certain places – convenience stores, Starbucks, various other hot spots – but generally the connectivity isn’t great. You often need to login and sign up for things as well. (Apart from that, Internet connectivity in Japan is supposedly some of the fastest in the world.)
It’s really helpful to have a connection when you’re going around for many reasons (of which I had to convince Jason were necessary!). Things like public transportation routes and schedules, business websites for opening hours and other information, on the spot language translation (See step 15) , social media, etc. We also won’t have use of our regular phones (data) while in Japan so we will be keeping in touch with family through WiFi enabled calling. (Most of that will happen be at the end of the day or early in the morning when we are at our apartment, due to the time change and so we don’t waste our batteries. But it’s good to have the option to make a call when you’re out in case of an emergency.)
You have two options – one is to buy or rent a SIM card and the other is renting a pocket WiFi (personal hot spot) device. In our opinion, pocket WiFi is the better option because 1) our phones are locked and can only use SIM cards from our account providers anyway and 2) there are two of us. If we were even able to get SIMs, we would need to buy one for each of us, doubling the cost. With the pocket WiFi, we can connect up to 10 devices.
You can arrange all of this ahead of time and schedule a pick up at either airport in Tokyo (and presumably the other major airports in Japan) or, for the WiFi device, pick it up at one of many Lawson convenience store locations (which you pick from a list).
Or you can buy a SIM on arrival in Japan.
There are several well-known WiFi rental companies in Japan – the ones I’d heard of were iVideo and NinjaWiFi. We went with iVideo because of their competitive prices, good reviews, and the fact that many YouTubers are partnered with them and offer viewers discount codes. (Thanks, Tokyo Lens!)
The airport pickup location closes at 5pm and we might not have made that so we arranged to pick up ours at a Lawson right outside the station closest to our first hotel. Doing that was a little confusing because the section of the site with the list of locations was all in Japanese and when you auto-translate it, it messes some things up and nothing made sense. Luckily, I could recognize the kanji characters of that station name and verified the address compared to Google Maps! Note: I don’t believe that the iVideo Haneda airport pick up location is actually IN the airport. Or else, I’m thinking of the afterhours location… But it is a 10 minute train ride away. Keep that in mind if you are arriving any time after 4pm-ish (to allow for getting through the customs check, etc). Note: Some AirBNB rentals offer pocket WiFi as one of their amenities. Look into that to avoid having to pay for one when you don’t need it. (It’s common but both of the AirBNBs we have booked don’t offer it.)
There are several apps that are specifically focused on travel to Japan as well as useful general travel apps. Download a few and try them out before you leave home to see which ones you like.
Some great ones we recommend are:
NAVITIME – Our number one choice for everything you need to travel in Japan, it has maps, articles, alerts, and a great “plan” function where you can save your itinerary and locations. A really great feature is that you can select a JR pass filter so that it will only give you information for transportation you can use for free with your pass. AppleGoogle Play
JNTO’s Japan Official Travel App – (similar to NAVITIME) A one-stop-shop for all your up-to-date travel info, like weather alerts (currently displaying updates on Typhoon Hagibis! – very helpful), travel tip articles, info on discount tickets and passes, and emergency contact info. AppleGoogle Play
VoiceTra – A great real-time translation service that is more accurate than Google Translate and less robotic sounding so that it’s easier for Japanese people to understand. AppleGoogle Play
Google Maps – If you create an account, you can drop pins at all the locations you plan to visit ahead of time and save them in various lists. You can also download maps to use offline.
When you are on the move, it is great for real time route and schedule info and is so detailed that it will even tell you which platform to wait for your train. AppleGoogle Play
XE – A currency converter with the current market rates. You can select your home country and country you are travelling to. Type the amount in yen and it will tell you how much that is in your home currency. Great to use while you’re shopping. AppleGoogle Play
Hyperdia – Another route and schedule calculator. Warning, it is only free for the first 30 days of use and then you have to pay for it, so if you’re going for more than 30 days, wait to download it until you are about to arrive (or anytime after that). AppleGoogle Play
Step 16:
Purchase some omiyage representing your home country to give to people in Japan.
Japan has well-developed gift giving culture. One aspect of this is the custom of giving omiyage (souvenirs) to your family, friends, and coworkers when you return from a trip. The gift you bring is usually a speciality of the region you were visiting. For example, Ehime Prefecture in Shikoku, southern Japan is famous for citrus. They might find something mikan (Japanese mandarin) flavoured to bring back with them.
It’s also customary when you move to a new place to give a small gift to your neighbours (on either side of you and, if you are in an apartment building, above and below you as well). This ensures good relations going forward as acts as a “sorry in advance that I may trouble you at some point”.
Although no one really expects this from gaijin (foreigners) moving in, I believe when they follow Japanese practices such as this, it’s always very well received! As for tourists who will only be in Japan for a short time, it can be quite a delightful surprise for a Japanese person to receive omiyage from you.
This is entirely optional, of course, but I like to advise fellow travellers to pick up a few souvenirs from their home country before arriving and have them on hand to give people as a small thank you. People you might want to give omiyage to could be your AirBNB hosts or ryokan proprietors, a tour guide or class instructor, or someone who has gone out of their way to help you.
We are from Canada and, of course, maple syrup is what we are most known for around the world. We’ve bought a few packs of maple sugar candies to give as the opportunities arise.
Step 17:
Pack your bags.
Packing for travel to a foreign country can be difficult, especially if it’s your first time visiting. Other than the basics – seasonally appropriate clothes, etc. – there are a few things specific to Japan that you might want to bring with you.
We suggest…
–cold medication/allergy medication – The strength of medication is different in Japan. Many people don’t buy OTC cold meds but rather go to a doctor for a prescription instead. If you’re travelling during the change of seasons, or if you’re like me and get all drippy and gross after being on an airplane, you might want to bring along some of what you’re familiar with.
If you don’t read OR speak Japanese, it can be hard to go pick something up at the pharmacy if you don’t know what to look for or even how to ask for it.
–antiperspirant deodorant and other specific products – I don’t know about the truth of this claim but I’ve been told that Japanese people don’t sweat as much as people of European descent… Regardless, a common complaint of foreigners living in Japan is that they can’t find deodorant or that the Japanese ones don’t work. Anything with an actual antiperspirant ingredient is apparently very hard to find.
For most cosmetic/toiletry items, you can leave yours at home and purchase items of equal (or better) value there. But if you are particularly fond of certain brands or have sensitivities and have to use specific products, bring all of those with you.
–portable charger, multi-socket power block, expandable memory/external hard drive, power cord adapter – These items can be found in Japan at most electronic stores, but in order to save yourself the hassle of looking around for them or in case they are too expensive, I recommend bringing them with you.
You’ll probably be using your phone a ton and all that map navigation, etc. can wear down your battery quickly. Have a little pocket size charger to supplement your usage.
Hotel rooms often only have one outlet, and if you are like us, you’ll probably have several devices each that will need to be charge each night. It’s really helpful to bring along a power strip with multiple sockets (and a surge protector!) so you can charge everything all at once. We recently bought a new one that has 4 outlets as well as 4 additional USB ports. Charging party!
Most people will suggest you bring an extra memory card with you to store all the pictures from your camera. I don’t know about these people because just the 2 memory cards still wouldn’t be enough for me! Haha. I always travel with an entire hard drive worth of extra memory and then dump my memory cards daily onto that. We take a TON of pictures as well as video and that takes a lot of space. (The videos from our 360 camera are HUGE – several GB each.)
Power sockets all over the world vary so, depending on where you are coming from, you may need an adapter. Japan uses the same 2-prong plug that is used in North America but they don’t use the additional 3rd grounding prong. When we were in Japan last, we noticed that most hotels (which are used to foreign visitor) had an outlet with a hole for the 3rd prong but not all of them. Both our laptop and the power bar I just mentioned need an outlet with 3 prongs so we’re bringing along an adapter too. If you’re coming from Canada or America and aren’t bringing any heavy duty electronics (just your phones and camera batteries, for example), you probably won’t need it.
If you’re coming from Europe, Australia, other countries in Asia, etc., you’ll also need an adapter since your outlets are totally different.
–towels – As I mentioned earlier, some accommodations, as well as some public onsen (hot springs) and sento (bath houses) don’t provide towels or only rent small ones out to guests for a fee. Some AirBNB hosts won’t provide them either. We’re not even sure if there will be towels available for us to use at our apartment.
I personally ALWAYS travel with my own towels because I quite often am accompanied by several people and hotels never provide enough towels for everyone or because I’m staying at someone’s house and… I’m picky!
–small hand towel for your purse/bag – You don’t necessarily need to bring this from home because they are sold EVERYWHERE in Japan (I personally recommend something from a character goods store.), but it’s something you will most likely need once you are there. Many public toilets don’t have hand dryers or paper towel. That is because most people there will already have a tenugui (hand towel) that they carry around with them everywhere. It’s also great to have to dry your hands on after you do the symbolic water purification at a shrine. And on a really hot day, you’ll see people taking out their tenugui to wipe their foreheads and the back of their necks. Very handy items to have. –shoes that are easy to take off and put back on and cute socks – It’s a well-known fact that you need to remove your shoes when you enter a Japanese home but you also do so at some temples, restaurants, ryokan, capsule hotels, etc. Anywhere with tatami flooring, you’ll be expected to take off your shoes at the door. You’ll be taking your shoes off and on A LOT. The space to do so in the entryway is often quite small and there usually isn’t a place to sit down. Anything with laces or long zippers is going to have you in the way of other people and waste your valuable time. Bring a pair of slip-ons, if possible. (People will be seeing your socks so don’t wear something you are embarrassed by.) Tip: Do NOT step onto the floor where you take your shoes off with your socks! Slide your foot out of the shoe and immediately step up onto the raised floor. Tip: If you are travelling in the summertime and wearing sandals with bare feet, bring a pair of socks to put in your purse or backpack to slip on after you take off your shoes. Don’t go barefoot in a temple! Gross.
In general, people always tell you to pack as light as possible. You can do laundry while you’re there or you can buy lots of cute, fashionable items. (Keep in mind though that Japanese sizes are small.) Suitcases are also a huge pain and inconvenience to lug around with you, not to mention they get in other people’s way as well. (See our recent packing-related posts on Instagram for more tips.) Note: You obviously need to bring your passport to get on the plane and then into Japan – but remember to keep your passport with you at all times once you’re there. It’s the law that foreigners need to have either their passport or a gaijin identification card (if they live there) on them wherever they go. There are many stories of foreigners being arrested for not having proper identification while walking around town. Tip: Make a few copies of your passport – keep 1 copy at your hotel in case you lose your passport and need to go to the embassy to get a new one and give 2 different trusted people back home one each in case you get into trouble. It’s just a precaution but can save you a lot of trouble and time should anything happen.
Step 18:
Inform your bank and credit card companies you will be travelling abroad.
In the “old days” before text message alerts, you needed to call your credit card company to let them know your travel plans so that if they noticed purchases being made in a different country than where you live, they wouldn’t decline them, thinking it was fraud. These days, they usually allow it to go through and then send you an automated text where you confirm that it was in fact you. However… we won’t have data available on our phones and therefore won’t be able to receive any texts!
Jason already called both Visa and MasterCard to inform them and got different responses. MasterCard said, “Okay, we’ll note that in your file. Have a good trip.” Visa, on the other hand, said they no longer did that and we could expect to get alerts instead. When Jason explained that wasn’t possible, the representative suggested we “leave a trail of bread crumbs” on our way over there (purchase something at each airport) and that should be good enough.
What the heck?
Anyway, it’s still a good idea to let them (and your bank as well) know when and where you’re going and for how long and see how that goes. Best of luck to you.
Step 19:
Plan for your flight to Japan.
Here is a checklist of things to make a long flight more comfortable:
(Good for travel anywhere, not just Japan)
(In the interest of time and since it wasn’t specific to Japan, this was a huge chunk we cut out of the video. We will probably post those outtakes at a later time. (Link will be added here when that is uploaded.))
–wear comfy clothes in layers – You don’t want clothes that are restrictive or dig in anywhere. Have a hoodie or sweater that’s easy to take off and put on. (When you first get onto an airplane, before the engine starts, it’s usually pretty hot but as soon as that air kicks in, it can get quite cold, especially way up in the sky.
–pillow and blanket – The teeny pillow they give you sucks! If they even provide one to you anymore. Sometimes you have to pay for them. And the blanket is so thin that you have to fold it up and then it’s way too small to be helpful. It’s also useful to have a pillow and blanket once you arrive in Japan in case the ones at your hotel or AirBNB aren’t up to your standards AND just in case you do end up having to sleep at karaoke or a manga café, like I mentioned earlier.
–slippers – Not a necessity but more like a luxury to make your flight as comfy as possible. Curling up in your seat and sleeping for so long, you’ll want to take your shoes off. But having to get up to use the bathroom or stretch your legs, putting your shoes back on is a pain. Having a cushy pair of slippers that just slide on is a treat. (Don’t wear just your socks around on an airplane! Yuck.) (Those slip-on shoes you packed for Japan will also work just as well for the plane.)
–a facemask and ear plugs – Depending on the time you depart and when your starting point is, you’ll probably, at the very least, have several hours of bright midday sun, if not THE ENTIRE TIME like we do. We leave around 2pm and it’s between 2:00-3:00 consistently as we fly backwards through the time zones. It’s very disorienting to go to sleep in the afternoon and wake up expecting it to be dark but the position of the sun hasn’t changed. It really weirded me out the first time! So have a face mask with you to block out the light. They do ‘gently force’ everyone to shut their blinds to simulate some nighttime hours but people will still turn on their reading lights or, like me, disoriented from sleep, open their blinds by accident.
Ear plugs are great to have during a flight to block out the roar of the engine sound and other people snoring, etc. Noise cancelling headphones are also good so you can hear your own music, although they can get uncomfortable after several hours. Ear plugs are something you’ll likely use again once arriving in Japan too, if you’re staying at any hostels, capsule hotels, or any other shared accommodation.
–snacks – Kind of an obvious one. It’s a long flight and they feed you 2-3 times but… some of it is inedible.
–empty water bottle – You can’t go past security with liquids but you CAN take an empty water bottle and fill it up at a water fountain (or Starbucks) once you’re through. I find that they never give you enough to drink during flights. They only give you tiny cups at a time. Stay hydrated! Being up in the air for long periods wreaks havoc on the body.
–toothbrush and travel toothpaste – Because 15 hours is a long time! Ewwww. You’ll definitely want to brush your teeth before landing. Normal-size toothpaste tubes are too big to go past security so get yourself a travel-size. Or even those pre-loaded disposable toothbrushes.
–sleeping pills – If you’re someone who has a hard time falling asleep on planes, you may consider taking a sleeping pill once you get onboard. I used to do this for any flight over 6 hours. I don’t remember my flight to Hong Kong at all! I slept the entire time.
–load your devices with books, music and movies – Keep yourself entertained while you’re virtually held prisoner in your seat for the majority of an entire day. There is “in-flight entertainment”, of course but you might not be interested in the movie options available.
–charge cords and a portable charger – I use my phone a lot while I’m flying, taking pictures, playing games or watching videos, and doing “work”. You can use your charger in the USB outlet in the panel in the headrest of the seat in front of you but half the time, they don’t work, so that’s why you might want a portable as well.
–a pen – to fill out your customs forms upon arrival. Do this before you leave the plane. Once you land, there isn’t a flat surface to fill it out and you want to speed through as quickly as possible to start your adventure.
–necessity toiletries (travel size, of course) and a change of clothes – in case your luggage is delayed on arrival
–any medications you take – Never, ever put your meds in your checked baggage! I made this mistake once and my baggage was delayed for 4 days. It ruined my entire vacation. Don’t let this happen to you.
Remember to account for the time difference when making your plans and booking hotels, etc. and keep in mind the lack of daylight savings, if that’s applicable.
Step 20:
Plan for your arrival in Japan.
Once you arrive in Japan, there are several things you need to do right away. Plan those out so that things go smoothly and you can start having fun right away.
Arrival Checklist: Pick up your SIM card or pocket WiFi. Exchange your JR pass.
You can choose your start date for anytime within a month from then. It doesn’t have to be immediately, but if it is, you can use it to take the Monorail or N’Ex. (See below.) Purchase a Suica or Pasmo (IC card). – This is a reloadable fare card to use on trains, subways, buses as well as at convenience stores, vending machines, and many other places. You get a 5% discount off your fare if you use a card.
(You can exchange for your pass and buy an IC card at the same ticket office area in any of the airports.) Get to your accommodations.
From Haneda Airport, you can take the Tokyo Monorail to Hamamatsucho station. This is a stop along the Yamanote line loop, which is the one that runs around central Tokyo and is most frequently used by tourists. From Hamamatsucho, you can transfer to get to wherever you’re going for only a few hundred yen more. The Monorail cost ¥490 – or use your JR pass if you activated it already. It takes about 20 minutes.
You can also take the Keikyu Airport Line to Shinagawa station (also on the Yamanote line) for ¥410, 20 minutes.
Other options include the Airport Limousine Bus which drops passengers off at specific hotels and costs roughly ¥4,000-6,000 and takes about 45 minutes, depending on where the drop off point is.
Both the Monorail and the Keikyu train start around 5:30am-ish and have a last departure just after midnight and run frequently. The limousine bus starts earlier and runs until 2am but only comes 1-2 times per hour.
From Narita Airport, you can take the N’Ex (Narita Express) train to Tokyo Station (on the Yamanote line) for ¥3,070 (or free with your JR pass). It takes about an hour and runs every 30-60 minutes.
Or you can take the Keikyu Skyliner train to Nippori station (on the Yamanote line) for ¥2,520. It takes 39 minutes and runs every 20-40 minutes. (If you buy in advance online or from a travel agent before you arrive in Japan, foreigners may only pay ¥2,200.)
The cheapest option is to take the JR Sobu line to Tokyo station. It costs ¥1,340, takes 92 minutes and runs once an hour. It’s also covered by the JR pass.
There is also Airport Limousine Bus service at Narita as well. It costs around ¥3,500 and takes about 100 minutes. There are several connections an hour but you need to find the one that gets you to your hotel, which could be more of a wait (or to Tokyo station).
From either airport, you can take a taxi but it’s way more expensive and takes longer so I don’t recommend that.
It’s obviously a lot faster and cheaper to get in to central Tokyo from Haneda than it is from Narita, which is why we highly recommend you choose Haneda are your arrival point if you have the option.
(Our info is specific to Tokyo (since that’s our experience and will be what the majority of people do). There is a TON of info online about getting to and from the airports online so we won’t expand on that further.) Drop your luggage off with atakuhaibin service. – Room for luggage is very limited on the trains. (The Tokyo Monorail has a designated luggage rack and although it’s more than on the trains, it’s still limited, especially when you have to share with other passengers during rush hour. There is ample room on the Airport Limousine Bus however.) It’s also cumbersome to drag your suitcases through stations and on the streets.
You can send your luggage to your hotel directly using a takuhaibin delivery service. (Takuhaibin is the general term for package delivery. Takkyubin is the brand name of that service provided by Yamato Transport.) It costs ¥1,800 per piece under 25kg measuring less than 80x40x30cm. Note: If you drop your luggage with a takuhaibin service before 10am, you can have it delivered to your hotel that day. Any later than that and you won’t get it until the following day so make sure to take out what you’ll need for that night and the next morning and put that in your backpack.
Congratulations! You are now fully prepared with all the information you need to plan your trip. (If I’ve forgotten anything, please do let me know. I hope, after 20 full pages, I haven’t!)
I hope some of this was helpful to someone out there…
Enjoy your trip to Japan!!! Let me know how it goes.
If you’ve never seen any of these, you need to stop what you’re doing and watch one right now! Each one is a veritable masterpiece.
My favourite movie – not just from Studio Ghibli, not just out of animated movies, but favourite movie of all time (more than Twilight, more than The Princess Bride, more than ET, more even than Star Wars) – is My Neighbour Totoro. And my second favourite movie ever is Spirited Away.
still from My Neighbor Totoro
still from Spirited Away
The best thing about Studio Ghibli movies is that they are full of adventure and heart.
The worlds each story takes place in, whether exceptional or mundane, are full of magic. Each and every scene is packed with stunning detail.
In Tokyo, there is a museum dedicated to bringing the feel of these movies to life. It’s a wonderland where every inch is bursting with small details for all your senses to feast on.
Or so I’ve heard.
I’ve never actually been there.
But wait. I’m a huge Ghibli fan, I’ve been to Tokyo twice, and I haven’t been to the Ghibli Museum???
Are you CRAZY, you might ask, or just really unlucky?
Well, yeah, I may be a little nuts but, in this case, it’s more the latter.
The Ghibli Museum is a mysterious place. Part of that is because you don’t know what you’re going to see. They have an extremely strict, zero photography policy. If you search online for what it’s like, you might read people’s stories about it but you will have a hard time finding any images or video of the inside of the museum.
a large statue of the robot from Castle in the Sky on the roof of the museum – one of the only things you CAN take photos of (image from tripadvisor.com, user ds1521hmo)
And part of it is due to the difficulty in actually going. Tickets are really hard to get. There are no tickets sold at the door. You must buy them in advance. And the sell out very quickly.
When you do get tickets, you feel like you’ve won a prize! You are special. You’re privileged. You are one of the elite.
Unfortunately, this Totoro-manned ticket booth is just for show. NO TICKETS ARE SOLD AT THE MUSEUM! (image from flickr.com, user – POD -)
Why is it so hard to get these tickets?
The museum is open daily from 10am to 6pm (except on Tuesdays) but only a limited number of people are allowed in per day. The museum is a very popular place. And with all of Tokyo’s almost 14,000,000 inhabitants and an estimated 30 million tourists going to Japan each year, you’re competing with many people to get in.
Tickets are sold in monthly blocks and go one sale on the 10th of the month previous. For example, if you want to buy tickets for anytime in September, they will all be on sale on August 10th. And they sell out almost immediately. Securing tickets is almost a lottery.
However, there IS a work-around that system, but it will cost you…
Read on!
lucky ticket holders awaiting their entrance (image from travelcaffeine.com)
These are the 3 methods for buying tickets to the Ghibli Museum.
1. From within Japan, in person, at a Lawson convenience store
Lawson is a chain of conbini that handles ticket sales for many events and locations. (Concerts, plays, etc.) Within Japan, Ghibli Museum tickets are sold exclusively through Lawson.
They have a machine in each store, called “Loppi”. You enter the store, look for their red machine, and use that to purchase your tickets. It prints out a receipt which you then take to the counter and an employee exchanges it for a ticket voucher.
Pros:
* Ticket vouchers are sold for 1000¥ and you get them immediately.
* Lawson stores are EVERYWHERE in Japan so it’s easy and convenient to find one.
* The vouchers themselves are nice looking and make a good souvenir as well.
Cons:
* The Loppi machines are only in Japanese (there is an English button, but most of the screens are still in Japanese) and you obviously have to be there in person to use it.
(On the Lawson website, in the Ghibli Museum section, there are step by step instructions in English to walk you through the procedure.)
Our Tips:
* Screenshot or print those steps out to take with you to the store. We’ve heard the system moves really slowly when ticket sales open up due to the number of people trying to use it.
* Go as close to 10am (Japan time) as possible to maximize your chances of getting yours.
pretty vouchers from Lawson convenience store (image from travelcaffeine.com)
2. From outside of Japan, online, on Lawson’s website
the official Ghibli Museum website has a link to Lawson’s online ticketing
Lawson’s Ghibli Museum section
At the exact same time that tickets are available to people within Japan through Loppi, tickets are also sold online ONLY to people outside of Japan.
Pros:
* There is an English option so it’s fairly easy to navigate.
* Tickets are the same price as buying them in person from Loppi.
* You will have your vouchers immediately after purchase.
Cons:
* Tickets sell out almost immediately. You have to be ready right at 10am (Japan time) to purchase them and even then, you might not succeed.
screenshot taken July 10th, indicating that tickets for next month already sold out
* You need to print your ticket vouchers from home. (Your confirmation page will have a QR code that will be scanned when you enter the museum.)
* Although easy to understand, there are many spots to fill out on the online form. Have each person in your party’s passport information ready to go.
* Do the math to figure out when 10am Japan time is in your timezone. (For example, if you are in my timezone (Eastern Standard Time), tickets would go on sale at 9 or 10pm (depending on whether we are in daylight savings, which Japan does not participate in) on the 9th.)
Our Tips:
* Before 10am, go to the site and read through all of the fine print. You don’t want to waste precious seconds trying to get through all the detail.
* Do not use autofill. You can buy up to 6 tickets per order and you need to give all of the names, birthdates, and citizenships of the people in your party. If you use the autofill function, it will put that one name for all of the fields.
* Have everyone in your group’s passports handy as well as the address of where you will be staying in Japan (hotel, Airbnb, etc.). They ask for a phone number as well but you can use your own number.
NOTE: For both tickets sold in store from Loppi or from Lawson’s online site, you need to select both the date you want to go to the museum AND a time slot. Entries to the museum are timed – either 10am, 12pm, 2pm or 4pm.
3. Outside of Japan, from JTB – either online or, if you’re in select cities, in person – IN ADVANCE
The Japan Tourist Bureau is an authorized dealer of Ghibli Museum tickets for foreign tourists visiting Japan. You cannot get them this way from within Japan and if you hold a Japanese passport, you are not eligible to purchase them this way.
*NOTE: These instructions are specific to JTB Canada, but JTB has branches all over the world. If you are elsewhere in the world, do a quick Google search to see if your country has one. (United States – United Kingdom – Australia)
Tickets through JTB are sold THREE months in advance rather than only one. On the 1stof every month, tickets for 3 months later are made available. Like through Lawson, the whole month is available at once. For example, if you want tickets for anytime in September, they will go on sale June 1st. (*NOT a typo. Regular one-month-before tickets go on sale on the 10th of every month. Advance three-month-before tickets go on sale on the 1st of every month.)
Pros:
* The online order form is the easiest to navigate of the 3 options. Tickets from JTB do not have a timed entry so you only need to select your top 3 choices of days. (List then in order of priority. If your first choice is not available, they will check your second and then third.)
* Since they are sold so far in advance, you are much more likely to be able to purchase them. They don’t sell out as quickly. (I just looked and there are still a few days available for October even though the tickets have already been available for almost a whole month.)
Cons:
* You will pay almost triple the amount for this peace of mind. JTB’s base price is $15 per ticket (as opposed to 1000¥, which at the current exchange rate = $12CAD) and then there is a $10 processing fee on top of that PER TICKET. And unless you live in a city that physically carries the tickets at their office location, you will be sent yours by mail. A $15 fee per order (up to 6 tickets).
For JTB Canada, the tickets are handled by the Vancouver and Richmond branches only. If you live near there, you can skip this fee and pick them up in person, but if you live elsewhere in Canada – even near the Toronto office – expect to pay that as well. (Example: For 2 adult tickets – $15 each, plus $10 each processing fee, plus $15 shipping fee. Total = $65! For comparison, to buy 2 adult tickets while in Japan would only be 2000¥/$24.)
* You have to wait for them to be delivered to you if you are having them mailed.
* No nice looking vouchers. Similar to the ones you print out at home, the JTB vouchers are plain paper, printed from a computer, but they are officially date stamped.
Our Tips: * Do not use autofill. You can buy up to 6 tickets per order and you need to give all of the names, birthdates, and citizenships of the people in your party. If you use the autofill function, it will put that one name for all of the fields.
* Know when you are departing from Canada and arriving in Japan. (Usually arrivals will be a day later than departure due to 12+ hour flight and time change.)
* Have up to 3 possible dates you would like to try to get tickets for – in case your first choice is sold out.
No matter which method you use to purchase, it’s important to know that you show your tickets vouchers when you arrive at the museum and that’s when you receive your actual souvenir tickets – with real film pieces embedded in them!
When you submit your vouchers upon admittance to the Ghibli Museum, you are given gorgeous “official tickets” with pieces of film from one of Studio Ghibli’s movies. (image from flickr.com, user sonson)
Also make sure you bring your passports with you to the museum. IDs are checked, including full names (must be exactly as they are on your passport), birthdates AND citizenships. Other forms of ID, such as a driver’s license, are not accepted.
That’s pretty much all you need to know about getting tickets for the Ghibli Museum!
Watch our Ghibli Museum Ticket Adventure (and learn what NOT to do).
*Also contains specific information on where the JTB office in Toronto is located – for when you want to pick up some JR Passes.
We will have a separate post and video about our actual experience at the museum once we’ve been there. Be on the lookout for that sometime at the end of October or early November.
Pick whichever method works the best for you and good luck with getting your tickets! 🍀
At this point, I don’t remember when or how exactly my obsession with all things Japan came to be. I just know that it wasn’t something that I had in common with anyone else. No one I knew shared my interest. I was all alone.
Not that that really bothered me. I have always been kind of quirky and loving Japan was just one of those things offbeat about me. (THAT is something that a lot of Japan otaku (nerds) have in common. We seem to like to think we’re the only ones. Hahaha. Like we think it makes us special or something.)
Being alone in my interests did have its drawbacks though (apart from being made fun of or being called a “weeaboo” or something similar – which also never bothered me). The main hurdle was that finding source materials, information, programming, etc. was really difficult. Back then, someone like me – being from a small town – didn’t have much at the local video store or library to choose from. Once the Internet became a thing, it got a little easier, but due to lack of interest and awareness, it took many years before there was the cornucopia of online content there is now.
But it wasn’t until the last few years that Japanese things became trendy and started to spill out into the real world. Before, when I wanted to buy import items, I had to shop online, pay exorbitant markups as well as shipping, or travel quite a distance to the few and far between shops available that had only a handful of products. I used to use Ebay quite a bit for music CDs (I am aghast as what I paid for a few of my import albums), and J-List.com for trinkets and character goods. There was also a cool service called Flutterscape (now defunct) that would act as a middleman for people in Japan who could pick up items for you and mail them out. Again, pretty pricey.
Finally, ‘all things Japan’ is gaining in popularity. It’s much more mainstream now. I think that’s partly due to the increase of Japanese anime being shown overseas and in part due to the availability of information about really any aspect of Japanese culture now on the Internet.
Anime seems to be a gateway into interest in Japan. (That’s always been the case, probably, but it’s much more prolific now than it was when I was young.) It’s not uncommon to run into a kid in North America who loves anime. When I was younger, it was seen as something dorky. Now it’s normal. Maybe we’ll get into that deeper at some point, but for me, it was the opposite. I was interested in Japan and found anime through that.
Back then, I never would have thought my local mall would become a place to grab some goods from Japan or an authentic Japanese meal or snack. I thought I’d always have to hunt for that kind of thing. It’s so easy now.
More and more places are popping up all the time – and Japanese styled shopping experiences seems to be the newest trend and copycats are also on the rise (as you’ll see in the descriptions below).
We briefly mentioned Square One in our Kariya Park video since it’s a destination for tourists and locals alike and is just a few hundred metres down the street from the park.
It’s the largest shopping mall in Ontario and the second largest mall in the whole country – although as Jason points out in Part 1, West Edmonton Mall in Alberta is only bigger in square footage, not in the number of retail stores.
Currently, there are only 6 options in Square One for shoppers looking for the Japanese shopping/dining experience but our fingers are crossed this is an upwards trend.
We introduced the first 3 in Part 1 and the rest in Part 2. They are listed below along with some more relevant information.
Part 1
Miniso
Miniso is a “variety store” which combines the aesthetics popular in stores such as Muji, Uniqlo and Daiso.
MINISO is not just a brand name but also a way of life. In an economy polarized by luxury brands and low-quality counterfeits, shoppers are divided into two extremes and opposing consumption pattern. MINISO delivers on this unmet demand in Canada and provides shoppers with good quality products and aesthetically pleasing designs. Affordability and competitive pricing is also a key principle in MINISO’s philosophy. Through the development of quality products and living goods, MINISO strives to become a global leader in providing excellent products for a better life.
Driven by simplicity and nature, MINISO aims to continually improve and innovate the processes for designing and manufacturing quality goods at honest prices, while considering the environment, energy saving, recycling and resources. Under the scale of global procurement, MINISO sources the best materials from all over the world while ensuring the health and safety of products and materials.
*CONSPIRACY: It’s actually a Chinese company “pretending” to be Japanese. ??? Maybe because the popular view of products from China being cheap and from Japan being better quality? The sign/logo itself is written in English and Japanese (although in Japanese, it reads as “Meisō”) but not Chinese (outside of China). Regardless of where it originated, they do sell a lot of Japanese products (snacks, etc.)
On their website, it states they are a Japanese based company: miniso.com/EN/Brand
MINISO, a Japan-based designer brand, was co-founded by Japanese designer Mr. Miyake Junya and Chinese young entrepreneur Mr. Ye Guofu in Tokyo, Japan, with the former serving as chief designer.
Even with the controversy, their expansion is a success and their stores are very popular. They do carry Japanese snacks and much of their packaging is in Japanese. We’ll leave it up to you whether or not you consider it a Japanese store or not.
Miniso was founded in 2013 and in 2017, they opened their first Canadian location. There are currently 48 stores in Canada.
17 in Ontario (1 in our city, 2 in Mississauga, 1 downtown)
14 in BC
11 in Quebec
5 in Alberta
1 in Nova Scotia
There are only 3 locations in Japan listed on their website (but only 4 of the 48 in Canada, so there may be more).
Muji
Muji is a company that carries items for everyday life – clothing, cosmetics, home goods, furniture, etc. – that are simple and basic yet good quality.
MUJI, originally founded in Japan in 1980, offers a wide variety of good quality products including household goods, apparel and food.
Mujirushi Ryohin, MUJI in Japanese, translates as “no-brand quality goods.”
MUJI is based on three core principles, which remain unchanged to this day:
1. Selection of materials
2. Streamlining of processes
3. Simplification of packages
MUJI’s products, born from an extremely rational manufacturing process, are succinct, but they are not in the minimalist style.
That is, they are like empty vessels. Simplicity and emptiness yield the ultimate universality, embracing the feelings and thoughts of all people.
The company (Ryohin Keikaku Co., Ltd.) was founded in 1979 and they opened the first independent Muji store in 1983. They operate several other branches of the company such as hotels, home design, camp sites and they even made a car at one point.
Although they opened their first international store in London back in 1991, Muji stores didn’t come to Canada until 2015. (The first store was the downtown Toronto location and it was recently renovated and is now the biggest store outside of Asia.)
There are now 5 locations in Ontario. Only 3 in BC.
476 in Japan.
UNIQLO is a new Japanese company that ensures it provides casual clothes for all kinds of people.
The basis for the company we now know as Uniqlo first started as a men’s clothing store in 1949. In 1984, they opened a unisex casual clothing store called “Unique Clothing Warehouse”. It wasn’t until 1988 that the name Uniqlo (a contraction of Unique Clothing) was born.
The first Canadian stores were opened in 2015.
There are now 7 stores in Ontario and 4 in BC.
835 in Japan.
Part 2
Tsujiri
Tsujiri is a café/shop that sells matcha drinks and sweets.
TSUJIRI was founded in 1860 by Riemon Tsuji who was renowned for his spirit of “YUWA”, meaning “continue to innovate and sustain the tradition”. His statue was built in Kyoto, Japan to honour his contribution to the Japanese tea industry. Mr. Tsuji has refined the cultivation of Gyokuro (the highest grade of Japanese green tea) and his method is still being used to this day. He is also the inventor of the tea box that preserves the longevity and freshness of the tea leaves during transportation, making fresh tea from Kyoto available to other Japanese cities a century ago. In 2010, CHAHO, which means tea ship in Japanese, were first established outside of Japan to carry on our founder’s spirit and to serve fresh tea to our customers worldwide. Welcome to TSUJIRI CHAHO.
6 stores in Canada (3 Toronto, 1 Mississauga, 1 Edmonton, 1 Richmond) – 3 more opening soon
I can’t find any information on Japanese locations. Only one shows on the map on their website, in Kitakyushu, Fukuoka.
I found a chain of shops called Tsujiri (Uji, Gion Kyoto, Osaka and Ginza) but the logo isn’t the same. www.kataoka.com/tsujiri/shop
From what I understand (I think…), Kataoka is a company that serves as a go-between for importing overseas brands to Japan and exports their own brands worldwide from Japan, Tsujiri being one of them. The description of their Tsujiri brand is very similar to the overseas Tsujiri stores.
Tsujiri was founded in 1860. The founder, Tsuji Riemon, invented the tea chest and perfected a method for making Gyokuro green tea. These innovations enabled Tsuji to revive the good name of Uji tea, which had been threatened with disappearance amid the upheavals that ended the Tokugawa Shogunate. Today Tsujiri continues the tradition of Tsuji Riemon’s passion for perfecting great tea. With assured skill and commitment to quality, Tsujiri continues to deliver a delightful variety of excellent teas today.
In the video, I was a bit disappointed that they didn’t have any of my favourite treats available that day. Lucky for me, when I was at the mall a few days ago, they had them! Kinako Daifuku are thin layers of mochi wrapped around a delicious dollop of kinako-flavoured mousse, with kinako flour sprinkled on top. They also have matcha-flavoured ones, which I’ve never tried but look just as yummy, as well as traditional daifuku, which are usually filled with red bean paste and a strawberry.
Sansotei is inspired by traditional ramen from various regions in Japan. We source the highest quality ingredients both locally and direct from Japanese suppliers. Sansotei was founded in Toronto, Canada in 2012 with our first location in the heart of the city.
There are currently 9 locations (2 outside of the GTA), and 1 more opening soon.
Sukoshi Mart
A store that carries “a little bit of everything” – snacks, character goods, cosmetics and some art prints.
Currently 2 locations (Kensington, SQ1) – Royal Bank Plaza opening soon – STC was a pop-up but permanent location is opening soon
Sukoshi Mart is not a Japanese company but it carries goods from Japan (and Korea) including snacks and character merchandise. It’s a good place to get items that are hard to find or can only be ordered online from overseas.
We hope you enjoyed our little virtual tour! What Japanese stores are available near you?
When someone from a non-English speaking country wants to travel elsewhere, they will probably need to have at least basic English speaking abilities. It’s hard to get around otherwise. They may run into a few people here and there that speak their native language, but signage and written assistance, etc. will all be in English (or in our case, French as well as English).
Conversely, it seems that wherever we go in the world, the possibility of having others be able to speak to us in our own language is high. Many signs are written in English and, in areas where it’s not spoken as much, odds are there would be something like information pamphlets written in English. If we were to run into trouble (get sick or hurt), there are often English speakers available to help out.
There is no “universal language” (yet) but English is the closest there is to that. And yet, they say that English is one of the hardest to learn as a second language.
For the people who slogged through years of learning English, just think how good it must feel to have that go the other way and interact with someone who made the effort to learn their language!
This is especially true in Japan. English language education starts in grade school and continues throughout a student’s educational years. I don’t know if it’s due to the academically focused way they have of teaching it or due to the complete rearrangement of grammatical sentence structure, but I’ve heard Japanese people find English learning especially difficult. That’s why they seem to be so happy when the tables are turned and they can see that you have put some time into learning their language.
Our channel was made specifically to show how it’s easy to travel around in Japan without being able to speak any Japanese (in part due to those very reasons) but we are still encouraging you to learn a few simple words.
By making that effort, you show a huge amount of respect. You’ll also be making things just a little bit easier for yourself. It IS easier to get around when you can say a few things (even if it’s not entirely necessary) and locals will often treat you with added kindness when they can see you trying, no matter how bad your accent is or if you stumble over or mispronounce things.
We have made a short list of phrases that we think EVERYONE should learn in the language of the country they are travelling to, no matter where in the world that may be. Our list is universal and doesn’t require any “fill in the blank” extra vocabulary. (Yes, there are other extremely helpful things, like “where is the toilet?” or “may I please have a coffee” or “how much is this?” but you would have to learn various words to fill in with as well as need to be able to understand the responses.) This list is the simplest, need-to-know phrases that don’t require any extra knowledge or learning.
This list is shortened for Japanese because a few of those phrases are conveyed by one word. Lucky you!
As with any language, I’m sure, some of these phrases/words require a little explanation or further translation to understand the deeper cultural meaning behind them.
Like we said in our video, there is no actual equivalent to a plain old “hello” in Japanese. In English, no matter the time of day or situation, you can greet someone with hello. It can also be used to grab someone’s attention (entering a shop with no employees visible or waving your hand in front of someone’s face if they appear to be not listening to you or lost in thought). It’s also the greeting you give when answering the phone. Definitely not the case in Japanese! They have different words altogether for those situations.
Greetings (or aisatsu) are a bit different in Japanese. They are specific to times of the day and different situations. There is also politeness level to consider, but that is much more advanced stuff that not only do I feel unequipped to explain, but is also completely unnecessary here. We’re keeping it basic.
When a non-Japanese speaking person is travelling, it’s good enough to just learn to say ‘good afternoon’ and use that as a standard greeting. If you were a native speaker and greeted someone early in the morning or late in the day with kon’nichiwa, you’d probably be given strange looks or the person might possibly formulate ideas about you. “What a lazy bum! Did she just wake up now and think that it’s still morning?” Haha. But as a gaijin who probably only knows a few words, no one would think anything of it. They’d just be pleased you were trying out the bits you know.
If you do want to learn all three of the standard time-related greetings, here they are for your reference.
Good morning. Ohayogozaimasu / おはようございます
(Pronounced like the state of Ohio, with the ubiquitous ‘gozaimasu’ suffix attached.)
Note: You CAN just say ohayo but it’s quite casual. (You can get away with inappropriate casual with your “gaijin pass”.)
Good afternoon. Konnichiwa / こんにちは
Good evening. Konbanwa / こんばんは
There are several different formulations of domo arigato gozaimasu that can be used and the different combinations infer different levels of politeness.
To say all three words sounds very polite and respectful, making you sound very grateful. Similar to ‘thank you very much’.
Domo arigato -or- arigato gozaimasu would be like saying ‘thank you’. Perfectly polite and to the point.
Just arigato by itself is still polite but just slightly more casual, sort of like ‘thanks’.
Domo alone is much more casual and maybe like ‘thank ya’ or ‘THX’.
Just note that you can’t say gozaimasu by itself. It doesn’t carry any meaning. It would be like saying ‘ing. It’s just a word ending.
For the simplest way to thank someone, show appreciation and politeness, arigato gets the message across clearly. (Pronunciation tip: It’s not AIRY-gato It’s ah-ree-gato.)
One of my favourite aspects of Japanese (and any language, if you think about it) is the underlying connotation of words. One word can mean different things, depending on the situation. That is especially true of the next word. It’s basically a 4-for-1. (It’s also how we fit all we wanted to teach you into only 5 phrases! 😉 ) Not just for this reason but also because of the frequency of usage, if you learn only ONE word in Japanese, sumimasen should be the one.
We explained it in detail in the video but I want to clarify a few more things.
The main translation of sumimasen is ‘excuse me’ and the apology idea is sort of baked right into that. It’s very similar to how Canadians are stereotyped for saying sorry all the time, even when the other person is at fault – except the Japanese have us beat.
The secondary translations, which include sorry, thank you, and please, have the ‘excuse me’ underneath them.
There is another word – shitsureishimasu / 失礼します – that also translates to excuse me but isn’t really used in casual settings. It has a higher level of politeness. In my mind, it’s better translated to “pardon me”.
There is another word to say sorry in Japanese – gomen nasai / ごめんなさい – but that is more formal or for a more serious offense. “I apologize” rather than a simple “sorry”.
Likewise, there are other words for please – kudasai / 下さい and onegaishimasu / お願いします – but they don’t have the undertone of apology. I would personally use kudasai/onegaishimasubefore an action takes place and sumimasenafter someone has already gone out of their way for me.
We did mention in the video that you would use sumimasen to call attention to a waiter, but didn’t make note of just how often that’s done or how necessary it is. At many establishments, you HAVE to yell out sumimasen when you want to order something or to call the staff over to you. It’s considered impolite for them to hover around you or interrupt your conversation so they will leave you alone until beckoned.
One more note – sumimasen is sort of a magic word when you need to approach someone to ask a question. I saw an example on a TV show a few years ago where an English-speaking girl did an experiment. She wanted to ask directions and first, approached people out on the street saying ‘excuse me’ in English. Almost everyone ignored her or brushed her aside and hurried on. When she tried again, approaching people with sumimasen instead, they stopped to listen even though she continued on in English.
It’s not at all that people in Japan are rude. They are actually generally very eager to help out. It’s more that English, right off the bat, can be too intimidating for them.
Keep that in mind if you ever need assistance from strangers when you’re travelling in Japan. Sumimasen will take you a long way.
Wakarimasen is fairly straightforward. It means “I don’t understand” but people will also take it to mean “I don’t speak Japanese” when coming from a foreigner.
One of our viewers made a good point though. (Shout out to Ranerdar!) If you say wakarimasen, the person who is speaking to you may just think that you don’t understand the idea of what they are saying rather than the actual words. They might try to rephrase it or say it more slowly. If you want to make it clear you don’t speak Japanese at all, you can say “Nihongo o wakarimasen / 日本語を分かります”, meaning “I don’t understand Japanese”. No room for error with that.
We went through a bunch of examples where you would use ii desu ka in the video but didn’t explain that it also means “Can I?” or “Really?” / “Are you sure?”
If someone were to appear to offer you something and you aren’t sure if you can take it, use this phrase.
Imagine that you’re at an izakaya (Japanese style pub) and someone gestures for you to help yourself to what they’re drinking, you would want to say, “really?” Or you’re in a shop and they have delicate looking items you want a closer look at. You would ask “can I?” if you want to pick it up. If you’re walking past a food stall at a matsuri (festival) and the vendor offers you a sample, you’d say “are you sure?” All of them translate to ii desu ka.
Our bonus phrase – Do you speak English? / Eigo o hanasemasu ka – wasn’t included in the ‘official’ list of Top 5 Must-Know phrases due to its difficulty but there is an easy get around if you can’t remember it or have a hard time pronouncing it. You CAN just say Eigo? (English?) and the person will get the idea. (It’s pronounced like the waffle brand, Eggo.)
We said we may make another Useful Phrases video at some point… Either way, we will at least throw up some of those fill-in-the-blank questions (Where is [something]?), along with some of the common vocabulary words to insert, in a future blog post.
One final thing to note: You may notice that some of the words we used, such as the desu from ii desu ka, sound like there isn’t a u at the end. It sounds like it’s pronounced as ‘dess’. Technically, it’s still there but really clipped.
Other than the letter N, Japanese syllables as always vowel or consonant-vowel. (A-Ri-Ga-To) And -u and -i sounds in the middle or end of words are often almost slurred over. Sumimasen can often sound like s’mimasen. The word shitsureishimasu (mentioned earlier) is a hard word for English speakers to pronounce. (When I took Japanese in university, we sometimes had a one-by-one “speaking check” at the end of class to make sure we were pronouncing certain difficult words properly and that was the first one.) It comes out sort of like ‘sh’ts’reishimass’. Even now I have a hard time with it.
Ganbatte! / がんばって!(Do you best!) But don’t worry too much over it. Even with poor pronunciation, you’ll probably be understood and your Japanese speaking listeners will applaud your effort.
Happy learning!
Here’s our bonus video explaining why foreigners – or gaijin / がいじん / 外人 – aren’t held to the same standards as native Japanese when it comes to customs and etiquette and are given a lot of slack when we make mistakes. We have the “Gaijin Pass”.
Something to note: Gaijin literally means “outside person” and, in some instances, can be taken as derogatory. Fellow foreigners will call each other gaijin but when Japanese native people refer to us, they are more likely to use gaikokujin / がいこくじん / 外国人 which translates closer to “foreign country citizen” and is seen as more polite.
Instead of just listing who we’re subscribed to, I’ve tried to edit this list into people who I think have good information on either planning your own trip and travel tips, or show places or activities you might want to consider. It includes a few who are now inactive for various reasons (quit YouTube, left Japan, etc.) but made worthwhile videos in the past that still deserve to be seen.
DISCLAIMER: This post is horrifically long. I seem to have an inability to sum up. 😆 If you are unable to read the entire thing, that’s okay. This is the expanded version of what’s in the video so at least watch that. It’s less than 5 minutes long! 😅 (The following post after this will be a copy of the YouTube channel links listed below for easy access.)
It could be said that I know a little bit about Japan… 🤔🤓
I’m definitely not an expert or anything but I think it’s a fair assessment that I know more than the average person. I’m sort of like a “jack of all topics” – I know a lot of random facts and trivia about numerous aspects pertaining to Japan. (The only area I know nothing about at all is government and politics. 😴) Some subjects I know just a bit, others quite a lot of information – but I’m not a master in any one area.
I remember a specific conversation when I was rambling on and on about something, vomiting out tidbits of information, and the person I was talking to stopped me and asked where I find all this stuff out. He hasn’t been the only one. Once I get started, I can be hard to dissuade and most people get that glazed look after a few minutes and start questioning how I retain all that info. My mind is generally a sieve, except when it comes to Japan. I think that can be attributed to 2 things. 1) I’m obviously very passionate about it. 2) I tend to read or watch the same bits over and over. It sticks because I’m interested and I keep hearing/seeing the same things.
Even with all the knowledge I have, it doesn’t mean that I automatically know where the best places to see and things to do would be. Everything is interesting to me – even the most mundane, everyday things others would find boring. If I could spend every day from morning to night for the rest of my life exploring every corner, I still would never be able to do it all. My problem is more figuring out what things and places would be the MOST worthwhile and how much I can realistically pack into the time we have.
For our first trip, I consulted guide books, which can be great, especially for a first-timer. But once you’ve familiarized yourself with what they offer – the basics – for someone returning again and again, you’ll need more. (They all seem pretty similar to me, although I haven’t used too many personally.) Guide books are also expensive and will become outdated fairly quickly.
So where does someone like me go for inspiration when planning a trip to Japan?
I rely on the following 4 online sources to gather fresh new info and ideas:
NHK World TV
YouTube
Pinterest, Instagram, Flickr
japan-guide.com
NHK World TV
One of the largest television and radio broadcasters in Japan is NHK. NHK World is their station for viewers outside of the country. It’s mostly all English programming but they have other languages available as well. (Since I speak English, I don’t have too much info about what else is offered.)
Although they do have some drama/sitcoms, the majority of their content is made up of documentary style shows and news. I have a voracious appetite for knowledge about any and all aspects of Japan (except politics, like I mentioned 😆) so these shows feed that. I am endlessly entertained, so even without trip-planning on my mind, I watch many of them all year round.
My favourite show (not just from NHK but for all television) is called Japanoloy Plus. It’s been on the air since 2008 – first as Begin Japanology and then re-branding in 2014. Each week, the host – British-born but longtime resident of Japan, Peter Barakan – explores a new topic, outlining the history and cultural importance, and interviews experts in the area. Even the most seemingly-boring episodes have been interesting in some ways. I’ve seen every episode at least twice, but some of my favourites, more than five times.
Another great show is Tokyo Eye. As you can guess from the title, it focuses on interesting aspects of Tokyo, aimed at people who are new to the city or visiting. I like how they highlight little-known areas and hidden gems.
#Tokyo (“Hashtag Tokyo”) is a fairly new show. Similar to Tokyo Eye, in that it’s Tokyo-centric, it highlights what travellers to Japan are interested in by tracking social media hashtags. It’s a good starter to grab quick info and tips since each episode is only 15 minutes.
Journeys in Japan is also very helpful for gathering ideas. Every episode features a different area of the country and follows that week’s host around while they take part in various activities and learn about what makes that place unique. I don’t think they’ve left a single corner of Japan undocumented. It’s nice to see places I know I’ll never personally have time to get to.
Core Kyoto is another show I really like. Kyoto, being the ancient capital, is steeped in tradition and therefore, this show keeps the cultural aspects as the focus as different topics related specifically to Kyoto are examined.
There are many more! You can watch NHK World either online directly from their streaming website or on their app. You can watch live or select one of their previously-aired episodes from the “programs” tab.
YouTube
YouTube is an endless source of content involving sightseeing suggestions and travel tips for Japan. You can find videos on anything you might be interested in. I subscribe to many channels who regularly upload videos introducing new-to-me destinations and experiences, so that in itself provides a great deal of inspiration. I also search out videos about various spots I’ve heard of and want more information or a different view on. For every place and activity, there are bound to be several videos about it. Not every video will be useful and not every useful video will have everything you need, but with several to choose from, odds are you’ll be able to get a good grasp on what you need to know.
There are 2 types of Japan vloggers – the first is someone who lives in Japan and lives that life daily and the second is someone who lives elsewhere in the world but has travelled to Japan and shares their trip in video form.
There are also 2 types of videos that can help you with your planning. The first type are full of advice on things like steps to getting you to Japan, what to pack, how to buy tickets and passes, what to think about and what to be aware of. The second type is a virtual tour of a certain destination or an activity.
Some of the people I subscribe to, I have been following for years. Others I came across recently while doing research. Some channels are exclusively Japan-related content and some are more general but have specific series of Japan travel videos.
Instead of just listing who I’m subscribed to, I’ve tried to edit this list into people who I think have good information on either planning your own trip and travel tips, or show places or activities you might want to consider. It includes a few who are now inactive for various reasons (quit YouTube, left Japan, etc.) but made worthwhile videos in the past that still deserve to be seen.
(I’m also on the lookout for new content to watch so if I’ve left off someone you think should be on the list, let me know!)
(Maybe someday I’ll organize this list further and provide a brief description of what each offers… If I ever find the time.)
And, obviously, if you haven’t already subscribed to OUR CHANNEL… now is your chance!
Pinterest/Instagram/Flickr
Once I’ve got a few ideas from NHK and YouTube, I move over to social media apps that are mainly pictorial. Having information on a potential places to see and things to do isn’t enough for me. I want to see as many different people’s views as possible.
Instagram is great because of the location tags and hashtags that link similar posts. When you search one thing, through those links, you can find other similar things. It’s a rabbit hole of inspiration.
Flickr is good too and gives me ideas on photo composition for my own future shots and unique perspectives I might not have seen before. I like to look something up and scroll through as many pictures of it as I can, saving my favourites. In our past trips, I’ve used photography from Flickr to annotate my itineraries as well as for inspiration for our own photography.
I hoard shots from both Instagram and Flickr and then link them on Pinterest (as well as finding more pictures there). That’s where I organize the images I’ve collected in ways that make sense to me. I group things into boards based on location or subject. I plan everything out including where we’ll go, what we might to eat, what we want to buy, and various activities we could do.
On my personal account, I have 50 boards for various Japan-related topics, including one that was just inspiration for our last trip. Since we’re going for so long this time, I knew one board would be too chaotic to handle the entire trip. I wanted to expand on each and every aspect. That’s why I started a dedicated JapanWithoutJapanese account and will have many boards to organize it all. (There are 17 already and I’ll be adding to it as I get deeper into planning out the details.)
Japan-Guide
The most useful online tool I’ve come across thus far is japan-guide.com. It’s way better than a guide book because it’s frequently updated, with new destinations added often, much more comprehensive and, best of all FREE! It’s easy to navigate and each location includes photos and maps as well as how to get to there, hours of operation, what costs are involved, a brief history or facts about the cultural significance, and maybe suggestions on where to stay nearby. I love how they often say whether or not you can use your JR pass to get there. One of the best parts of each location write-up is how, at the very top, they let you know right away if there is any construction going on and which parts are affected. (It sucks going to a place you’ve dreamed of seeing for years, only to find half of it to be covered up by scaffolding. It’s great to know ahead of time if you should skip it and use that time for something else.)
If you sign up for an account (for free), you can save the locations you research into a wishlist or mark whether you’ve been there before. You can interact with other members in the forums to seek further advice or to help out fellow travellers. There are also articles about many topics that are interesting and packed with information. They even do seasonal cherry blossom and autumn colour watches where they track and report on where and when blossoms/foliage are at their peak.
As noted in the YouTube section, they have an accompanying account where they post the best videos (in my humble opinion) that are not only super helpful and informative but beautifully shot and edited.
I can’t say enough good things about japan-guide. My only complaint is that I didn’t discover it sooner.
The following two sources I didn’t include in my list because I don’t find them quite as helpful/don’t use them as often, but I will still mention them here as a bonus.
Blogs – Other people’s blogs can be good. A simple Google search can bring up some helpful posts. I’ve done that here and there as well, but I don’t use general online searches as much as searching within the services I mentioned.
Facebook groups – I also joined a few Facebook groups dedicated to planning trips to Japan. There can be some interesting tidbits in them but I have yet to find anything super helpful or get any answers for my very specific questions. Depending on your level of knowledge and experience with travelling in Japan, groups may or may not be useful for you.
One more thing to be aware of: If you are searching for information from the general public (as in NOT an official tourism board or travel company – and even then…) BE SMART! Double check the facts from multiple sources to make sure it’s correct. If several different places are saying the same thing, you’re probably okay but if you only watch one person’s video or read one blog post, you might be getting something slightly (or completely) inaccurate.
These sources are all wonderful and I recommend you utilize them as well if you are planning your own trip to Japan. That said, everyone plans in their own way and what works for one may not for someone else. Try it out and see what is best for you. My one piece of advice is to do your research! Yes, absolutely ask questions of people who have experience in Japan, but ultimately only you will know what will interest you, at what pace you want to travel and what you are able to achieve. Only you know how much information you want to equip yourself with beforehand vs. how many things you’d be comfortable with just winging it.
It can be daunting to plan a trip, no matter the length, but in my experience, the planning, learning and anticipation are half the fun.
After a late start to spring and unseasonably cold weather, the sakura (桜 / さくら / cherry blossoms) have finally bloomed across the Greater Toronto Area. We began getting alerts early last week that flowers were out at High Park, Trinity Bellwoods, and outside Robart’s Library at U of T. We’ve been using Instagram to see when peak bloom time is happening (searching a location and selecting most recent posts) and, on our earliest day off together, decided we’d better make our way over to our favourite local spot – Kariya Park – to see if the trees were in bloom there as well.
This past Wednesday, we got up early and drove the 40 minutes into Mississauga. We wanted to get there around 9am to beat the crowds and catch some nice morning light. Even that early, there were a bunch of people there already – and to our surprise – of the 30 or so sakura trees at Kariya Park, only ONE tree was in full bloom.
As it turns out, there is only a single somei yoshino variety of sakura there. These are the most famous ones that have 5 pinkish-white petals per blossom. That’s what most people think of when cherry blossoms come to mind. There are, however, many more varieties and they all have individual characteristics and bloom at differing times.
somei yoshino sakura at Kariya Park
I’m not sure exactly which particular variety the other trees in the park are but I’ve at least narrowed down that the majority of them fall into the yaezakura category – they have larger, pink, multi-petal blossoms. They all had tons of buds ready to pop out at any second! (By the time this post and video are online, they will likely be at their peak.)
There is also one very tall weeping cherry (shidarezakura) by the second largest pond. It was also not yet in bloom this week, but should be very soon.
Even with just the buds, the trees were still lovely, giving the park a nice pink hue. And the single yoshino sakura was gorgeous! Three other photographers had the same idea we did and had staked out spots around the tree, taking shots from every single angle. (I felt kind of lame with my iPhone while Jason and the other photographers had “fancy cameras”. I still think I managed to get a couple of nice shots.) Take a look at our JWJ Instagram (for Karen’s ) and Twitter (for Jason’s) accounts to see our Kariya sakura photos.
Our main reason for visiting the park during sakura season was to have our own little hanami picnic. Hanami (花見 / はなみ) literally means “flower viewing” in Japanese and refers to the tradition of having an outing specifically to view flowers (mainly sakura), which usually consists of sitting under the trees and having a party. The word hanami also applies to the entire cherry blossom season.
Every year in Japan, hoards of people flock to public parks, lay out tarps under the sakura branches, and eat snacks and drink. I’m not sure how much blossom appreciation actually happens but it looks like a great time regardless.
hanami at Ueno Park in Tokyo – picture taken April 2015
The tarps are always the ubiquitous blue and snacks often include bento (lunch boxes) and traditional Japanese sweets and the drinks are almost always alcoholic. (These hanami parties can get a bit rowdy!) However, even though we DID bring our tarp with us, we didn’t sit because it’s been raining a lot lately and the ground was soaked. I was also too lazy to cook and prepare us some bento, so I just bought some onigiri (rice balls) at the mall food court. We didn’t have alcohol either – because A) it was only 9 in the morning and B) you can’t drink in parks in Canada. (You can in Japan though!)
I did pack our onigiri into a bento box. Just because I have one. LOL. (My friend Ames bought me a really cute Totoro one as a gift and I was happy to finally be able to use it.) And, although it wasn’t alcoholic, we did a taste test of a sakura-flavoured (??) cola I bought at a local Asian grocery store.
Jason surprised me by doing something completely unexpected when we were discussing what sakura flavour actually is. Make sure to watch for that! Haha. I guess that’s what happens when you make spur-of-the-moment, unplanned videos.
Our video also turned into a mini-tutorial on how to open an onigiri. It would seem straightforward but it’s more complex than it looks. Back in 2010 on our first trip, I thought I had understood how to do it but had never had one before and totally screwed it up. (There’s a video of that on my personal channel.) And even now, Jason didn’t realize the technology and thought that goes into onigiri packaging – and opened his own for the very first time.
onigiri from the mall – WAY more expensive than in Japan
An onigiri is a ball of rice with some sort of filling inside it, usually molded into a triangle shape. Most of the time, it comes wrapped in a piece of seaweed to keep the sticky rice off of your fingers. The ingenuity comes from the way that it’s packaged. If the seaweed were touching the rice for a long time (while it sat on a shelf in the store before you buy it, for instance), it would become limp and soft. No one wants that! Part of the appeal is the crispy wrapper. Therefore, there is a layer of plastic in between the rice and the seaweed which is peeled away with the outer layer after you break the seal. It’s brilliant!
It’s definitely one of my favourite snacks but it’s so hard to find around here and so expensive. In Japan, they are sold at every single convenience store, there is an endless variety of kinds, and I’ve never paid more than 170¥ for one. (They are usually only around 100-120¥.) There is only one store that I know of that even sells them here, they only have 2 kinds, and they are $3.99 each. Crazy.
I think onigiri will be the very first thing I eat when I get to Japan. 🍙
Now that our plane tickets are booked and the general idea for our itinerary is nailed down, I’m beginning to switch my focus to the specific details of what we’ll be doing at each stop and the times of arrival and departure in various places. I get ideas and inspiration from several different sources (more on that another time). Many of those have information about their own methods of trip-planning, which I make use of as well. They all have the same sort of basic outline – decide on dates, book flights and accommodations, buy passes and admission tickets, exchange money, etc. Of course that’s necessary. And obvious. These are the concrete things you must do. What I’m surprised by is the lack of abstract preparation advice. No one really goes beyond that. They may make mention here and there about what to expect once you arrive but I have yet to come across any suggestions of how to put yourself in the right frame of mind emotionally before your trip begins.
As time gets closer to my departure from regular life to the extraordinary, I inevitably attempt to fully immerse myself in everything related to where I’m headed. This time will be no different. I’ve already been spending a lot of time watching Japanese movies and listening to Japanese music as well as reading books about or taking place in Japan and that will surely increase as time goes on. More than just idea and information gathering, doing this purely for entertainment gets me excited about finally being there.
A huge part of trip preparation for me is creating a playlist. I see playlists as a soundtrack for my own life experiences. To go on a trip without one would leave me feeling unprepared. It’s often a completely ignored aspect of trip planning but something that should be on everyone’s to-do lists, in my opinion.
While researching my own playlist, I found one website that touched on exactly what I was thinking and talked about the importance of cultivating a playlist for you to listen to once you head out. Music can put you in the right frame of mind as well as solidify your memories. Often, you only need to hear a song to be transported back to a certain time and place. If you prepare, you can select which songs should be associated with which moments.
However, something thing I’d suggest is to create a playlist for the actual planning process. Whether it’s songs that you will potentially use in your final trip playlist or something different altogether, I find it really helpful to have specific music to listen to during my planning to hype myself up and keep me focused while I plod through the mental effort of amassing information, collecting ideas, narrowing things down, organizing, and detailing. It makes it more of a fun activity rather than an overwhelming chore.
Here are some of the tunes I’ve been listening to while I sit at my computer, hour after hour, trying to put this epic adventure together:
(Sidenote: Most of these songs are specific to Tokyo rather than Japan in general, but that’s what was available that fit the feel I wanted. If I were to write my own music, it would be more encompassing.)
Local Natives – Wide Eyes
♫ Oh, to see it with my own eyes ♪
When I was researching my Japan trip in 2015, I came across this song in someone’s video on YouTube. A perfect selection, if you ask me. It’s not Japan-specific but it speaks about the desire to see the places you dream about for yourself. I liked it so much, I sought out the entirety of Local Natives‘ discography and am now a fan.
The Bird and the Bee – Love Letter to Japan
♫ From the west to the east I have flown to be near you I have come all this way to be close, to be here with you … … I am yours, I am yours For as long, for as long as you will have me ♪
THIS. WHOLE. SONG.
I don’t know her, but I feel like she gets it. The obsession. The longing. Yes. This is a fellow Japan-lover.
PUFFY – Tokyo, I’m On My Way
♫ Tokyo, I’m on my way I’m going to be in love ♪
This was the very first song I picked for my original Japan Trip Playlist way back in 2010. Back before we started getting in trouble for using copyrighted music, I put this song in my own video of our flight taking off. When I hear it, it still holds that excitement of bouncing in my seat in anticipation of finally being on my way.
Pizzicato 5 – Non-Stop to Tokyo
♫ Non-stop, non-stop, non-stop to Tokyo ♪
The Japanese lyrics are mostly to do with having a summer vacation fling, but since the only English lyrics are “non-stop to Tokyo” and our flight IS non-stop to Tokyo, it seemed fitting.
My cousin introduced me to this song years ago. It’s just a bunch of Japanese name brands sung over and over, so as a song, it’s complete nonsense and it’s totally 80s but I love it.
The Pinker Tones – Tokyo
♫ Oh, why don’t we go to Tokyo? Come on, come on, come on
Let’s go ♪
Yes. Let’s!
Geno Samuel – City Lights of Tokyo
♫ Longing for the bright lights and the city sights of Tokyo ♪
I feel like I live in a perpetual state of that.
PUFFY – Tokyo Nights
♫ Tokyo nights I’m in love, I’m in love, I’m in love ♪
Even in Japanese, the lyrics don’t make much sense. It’s just a fun song that you can apply any meaning you want. Have a great time being crazy in Tokyo!
Tita Lau – Tokyo (Go Japan Go)
♫ It got a little crazy down in Tokyo ♪
That’s probably something a lot of people who’ve been there can relate to. And people who haven’t, can probably imagine.
Juno Reactor – Tokyo Dub
♫ Tokyo, out of my head you flow From my heart to my soul Watch the energy flow ♪
Those are the only lyrics of the song and they repeat over and over throughout the (very long) song.
A lot of songs about Tokyo talk about the fast pace, bright lights, and chaos. This song however is chill and relaxed, but it’s still got a nighttime, almost… high-tech (??) vibe. Like a robot in a club, maybe? Haha.
Plastics – Copy
♫ Copy people C-O-P-Y Copy this and copy that … … Tokyo Copy Town ♪
For as ridiculous as this song seems, it says a lot. I’ll let you derive your own meaning out of it, as I have. (I take it as a positive though, rather than something bad.)
Teriyaki Boyz – Tokyo Drift
♫ I wonder if you know how they live in Tokyo If you seen it, then you mean it Then you know you have to go ♪
Lyrically, a pretty shallow song but it’s still fun and will, of course, always bring to mind scenes from Fast and Furious: Tokyo Drift. I love it when tidbits of Japanese culture are shared with the mainstream masses.
The Presidents of the United States of America – Japan
♫ Everything is rockin’ out of control When we hit Japan ♪
Like a lot of other songs I came across (and skipped), this song highlights a band’s experience touring Japan, but unlike others, it’s in an excited, positive way.
I like to sing along with the repeated “when we hit Japan” part.
Yoshida Brothers – Kodo (Inside the Sun Remix)
♫ ♪
There are 2 Yoshida Brothers songs in this playlist. I chose them because I love the way the brothers blend traditional Japanese sounds (tsugaru shamisen, in their case) with modern beats.
I highly recommend picking a few songs that are instrumental only, that feed your hype through their vibe. I also recommend picking a few songs that are from Japan, rather than strictly about Japan. Yoshida Brothers would be a great choice because they have that iconic Japanese sound.
The Wombats – Tokyo (Vampires & Wolves)
♫ If you love me, let me go back to that bar in Tokyo ♪
Japan can be an escape for some people. And I’m also looking forward to leaving behind regular life for awhile to be there. There are many reasons I picked this song, but none of them are very profound. I just really like it.
Pharoah Sanders – Japan
♫ ♪
This is another purely instrumental song, no lyrics at all, but this one has a completely different feel. Slow and peaceful. When I first heard it, I immediately thought of the Shikoku Pilgrimage. (The bells in the song sound like the bells attached to the pilgrim’s walking stick.) That’s something I’d love to do someday. This time around, I’ll be able to visit one or two of those temples, so at least that’s something. For now.
Thompson Twins – Tokyo
♫ Tokyo, why can’t I ever say no? Tokyo ♪
I can’t say no either. (Although, I think they are maybe unable to resist something different than me. LOL.)
Honestly, I picked this song because it’s classic 80s. And I love the 80s.
BTW, if you’re interested in seeing what Tokyo looked like back then, there is an amazing series of videos on YouTube from a guy who digitized his old home movies.
Yoshida Brothers – Rising
♫ ♪
The other Yoshida Brothers song I chose. Isn’t it great?!
Kyu Sakamoto – Sayonara Tokyo
♫ Sayonara, Tokyo ♪
Well, that’s a pretty self-explanatory choice. (You knew that sayonara means goodbye, right?) I’ll be very sad to leave at the end of our trip and this song has that melancholic feel.
I also wanted to include a song by Kyu Sakamoto. You may have heard the SUPER famous song Ue o Muite Arukou, which is known in the west as Sukiyaki. It’s been covered many times over the years. That’s him!
Kay Cee Jones – Sayonara
♫ The time has come for us to say sayonara My heart will always be yours for eternity I knew sometime we’d have to say sayonara Please promise that you’ll be returning someday to me ♪
I realize she’s talking to a person but I’m talking about Japan.
Bonus Track:
I came across this song on two separate people’s Japan trip videos on YouTube when researching in 2015 and I loved the feel of it and gave my own meaning to “the importance of elsewhere”. Then I listened to the lyrics and realized it’s about a drug trip, not travelling. Hahaha. But it’s still a great song and I still link it in my brain to that jet-setting idea.
Lack of Afro – The Importance of Elsewhere
What songs make YOU think of Japan? What songs would you put on your own travel playlist?
If you’re having trouble loading all the videos links or if you want to listen to all the songs continuously, I made a public playlist on our YouTube channel.


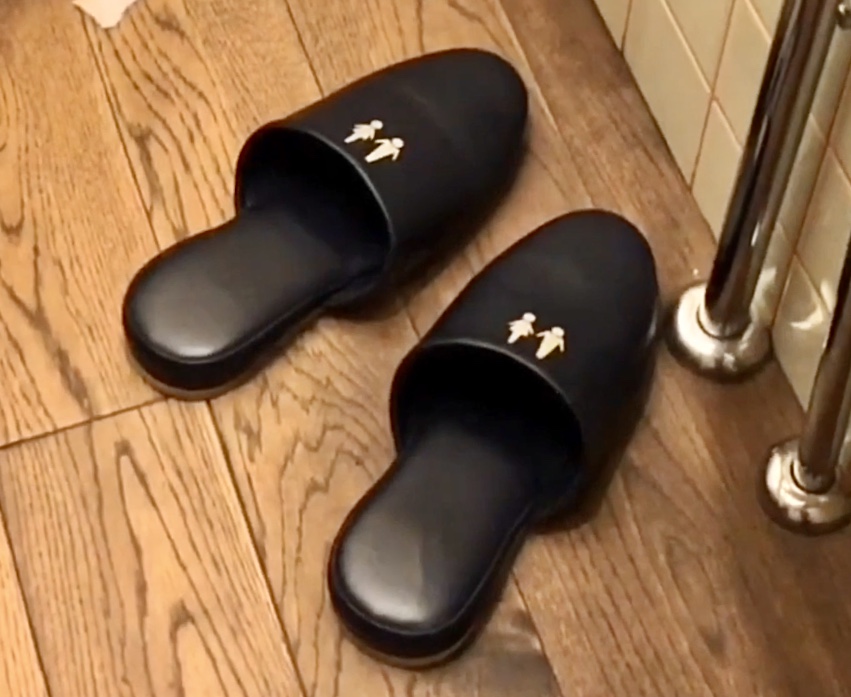
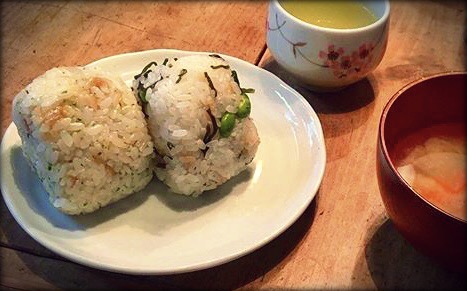


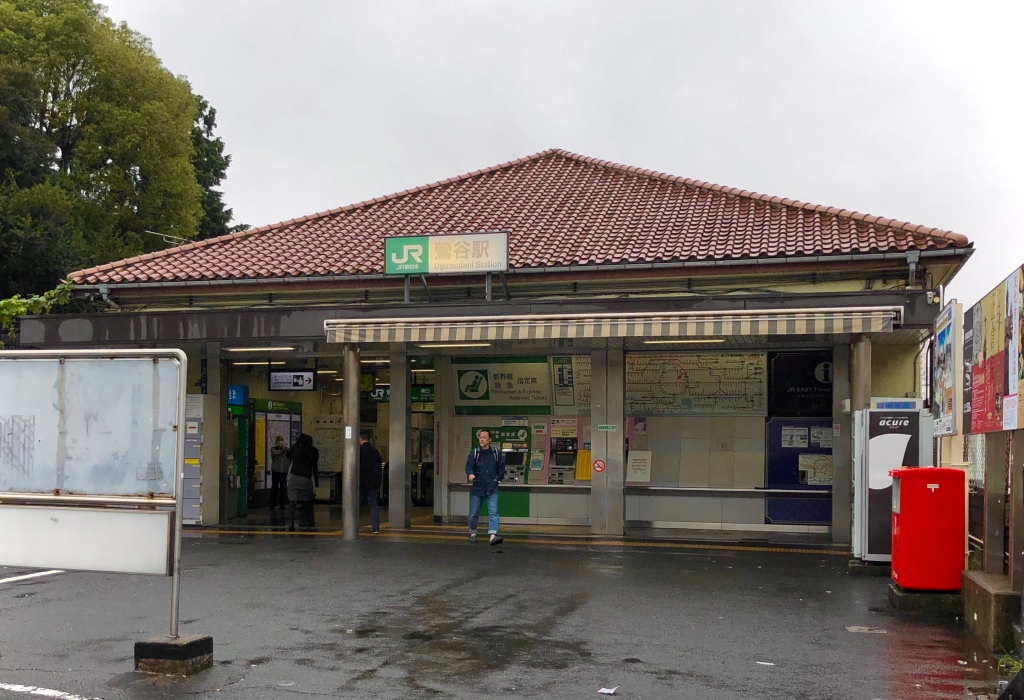
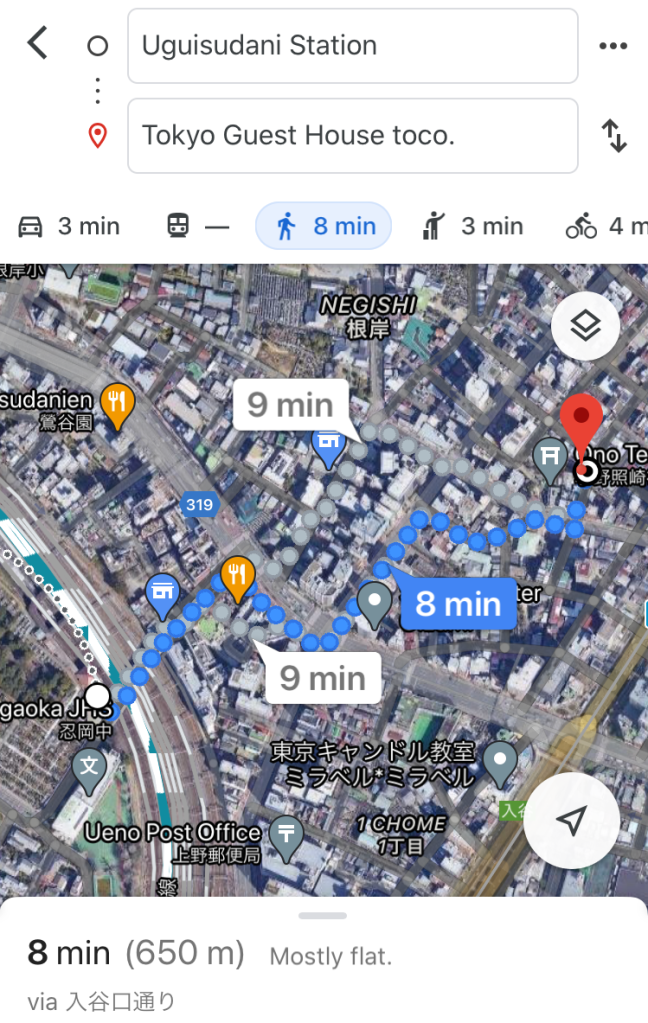


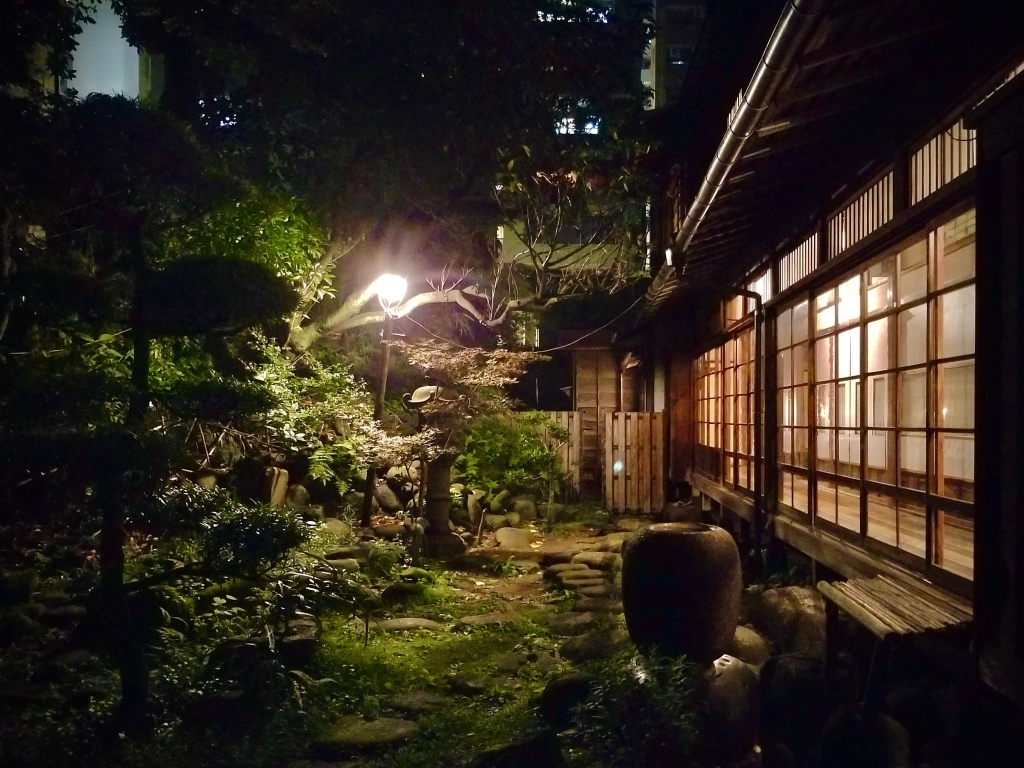


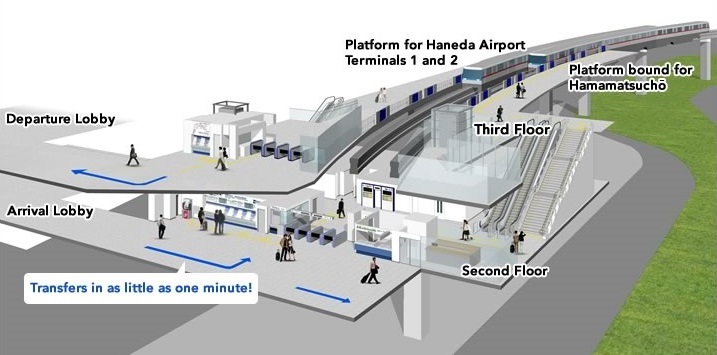

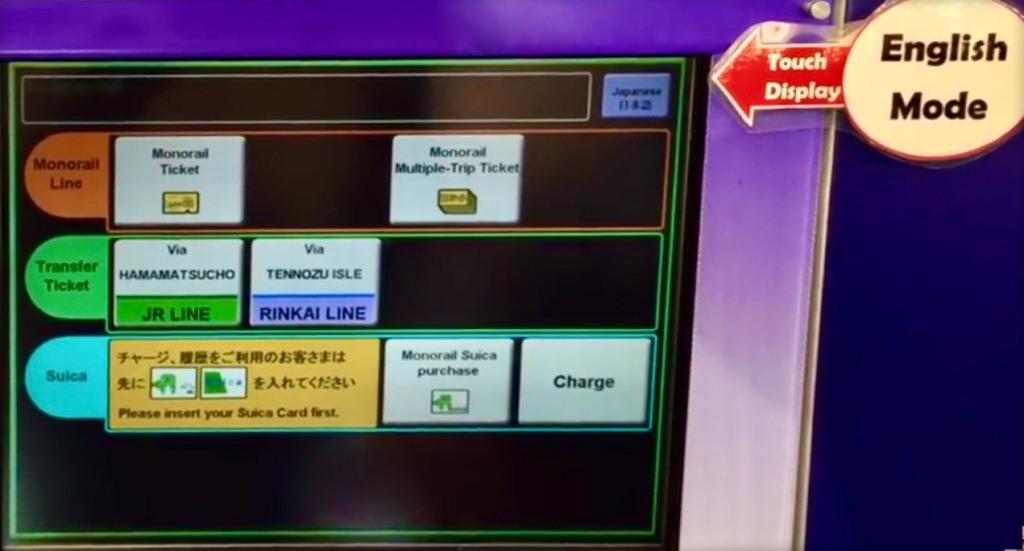


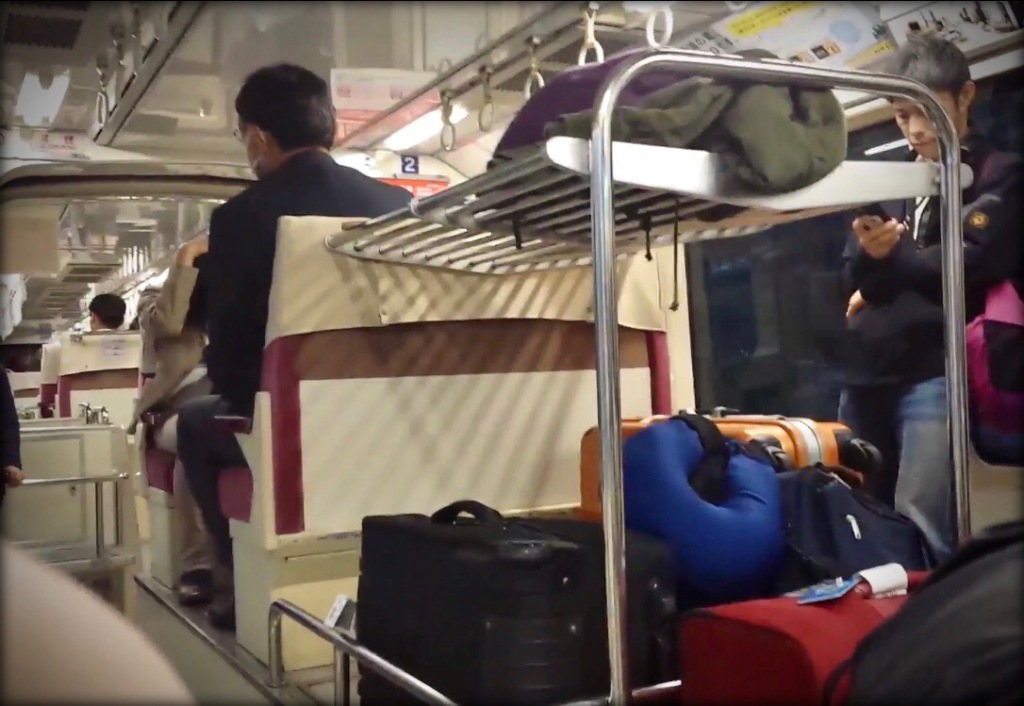


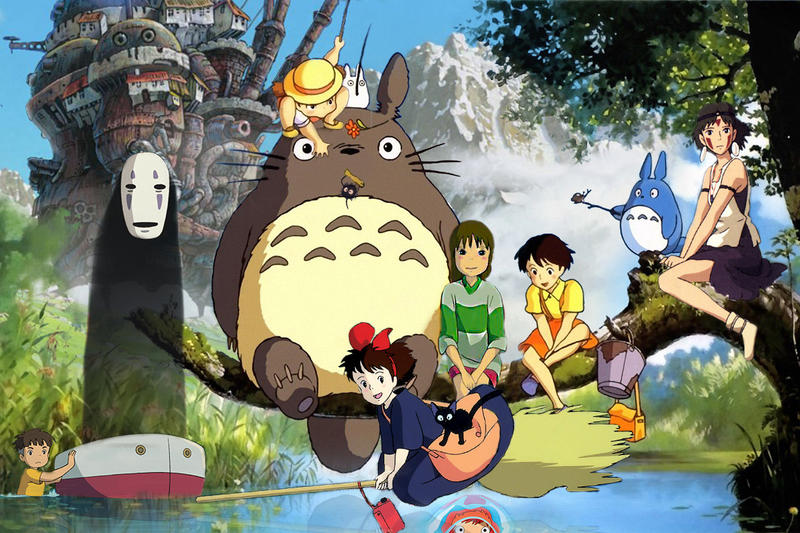


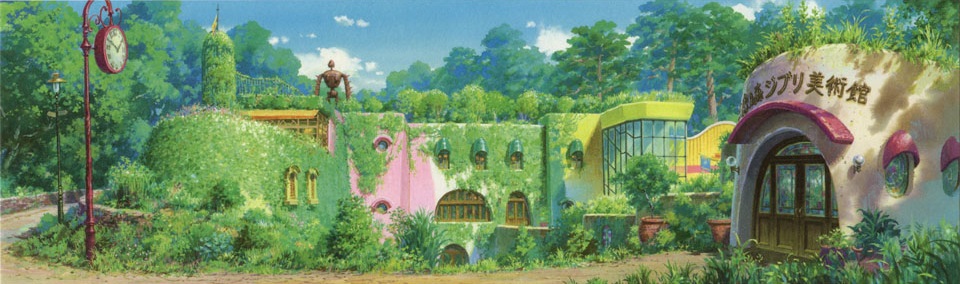
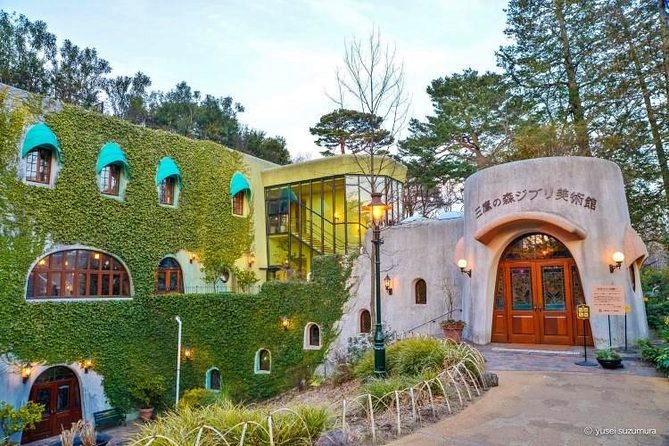
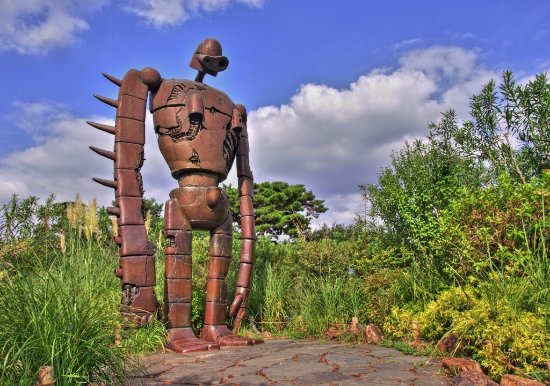
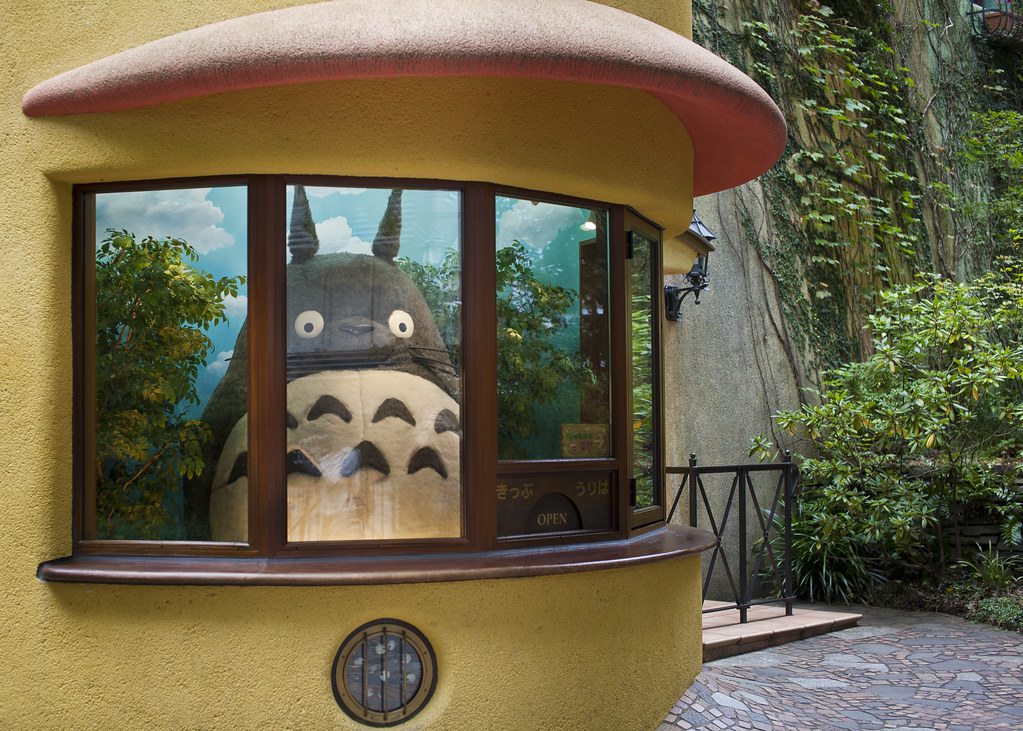
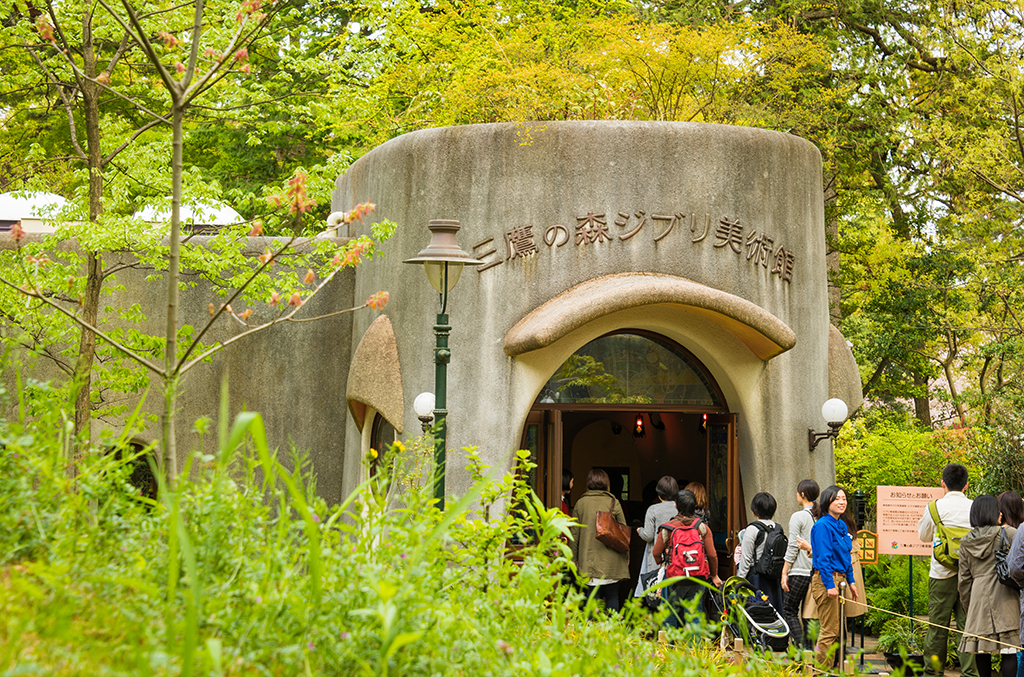
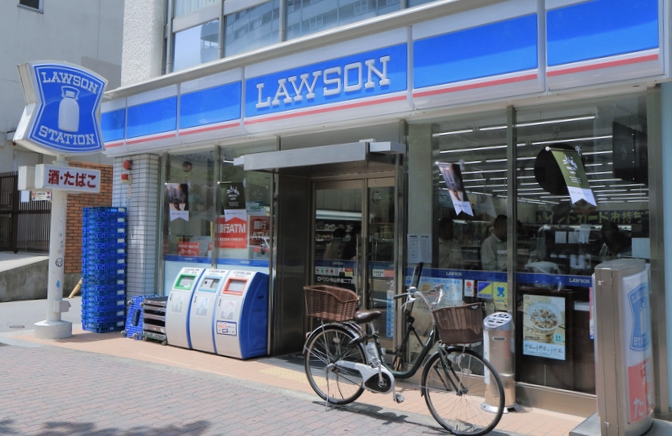

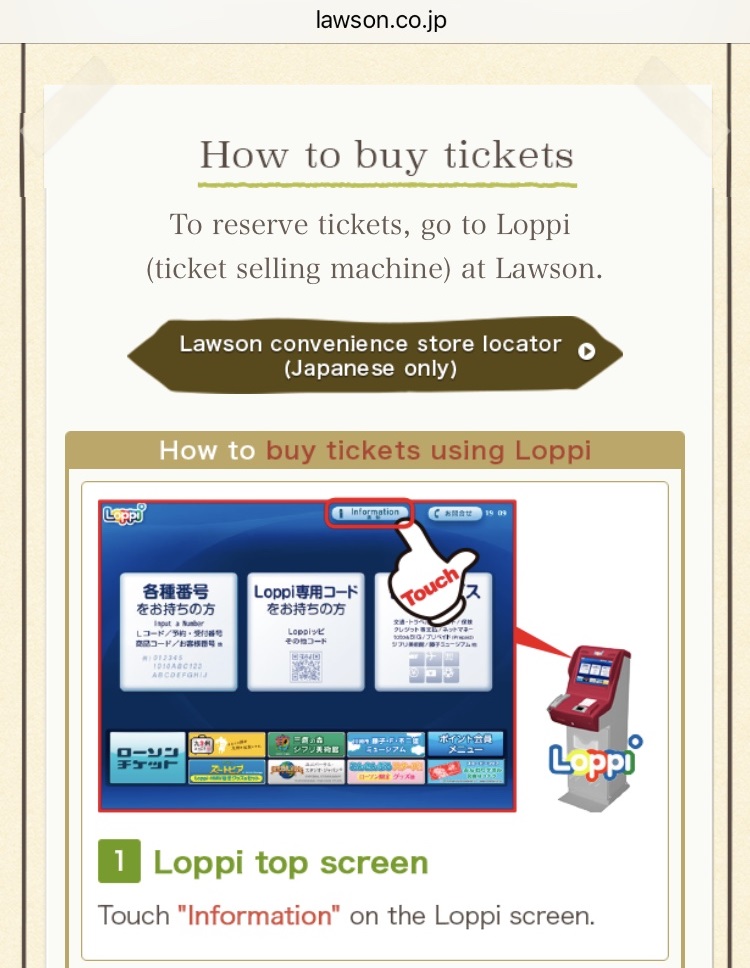
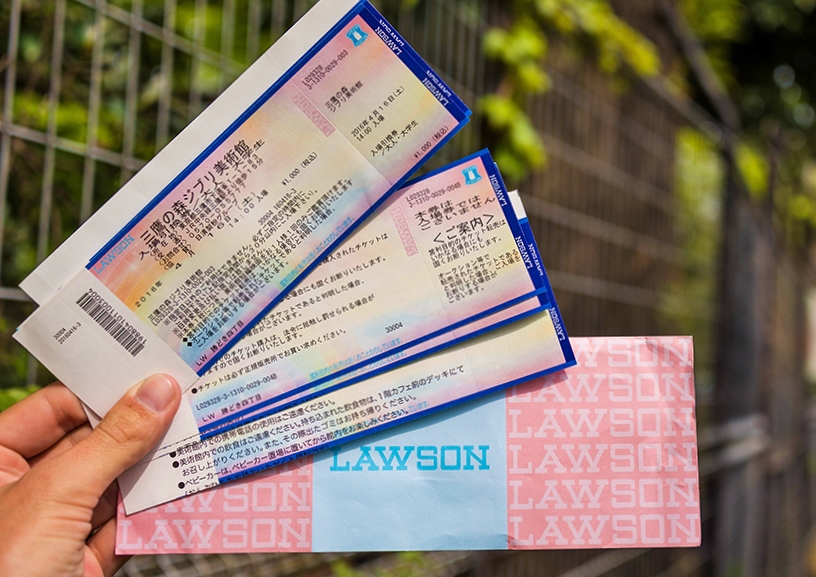


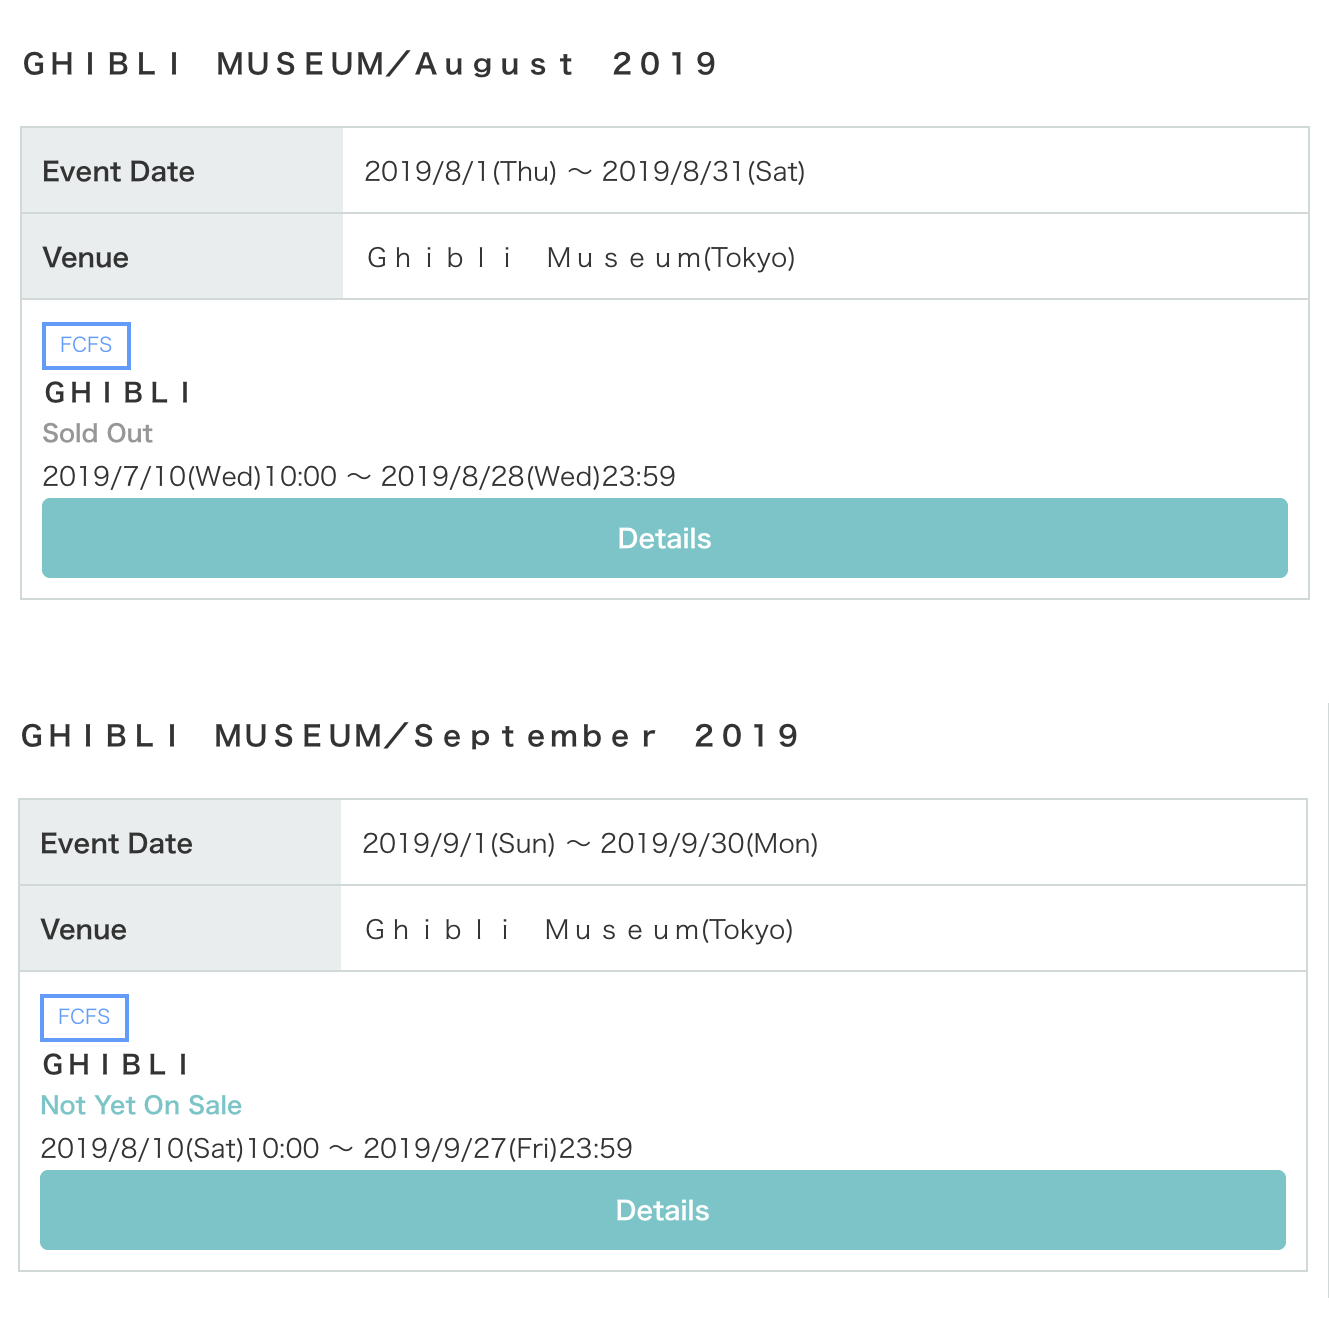


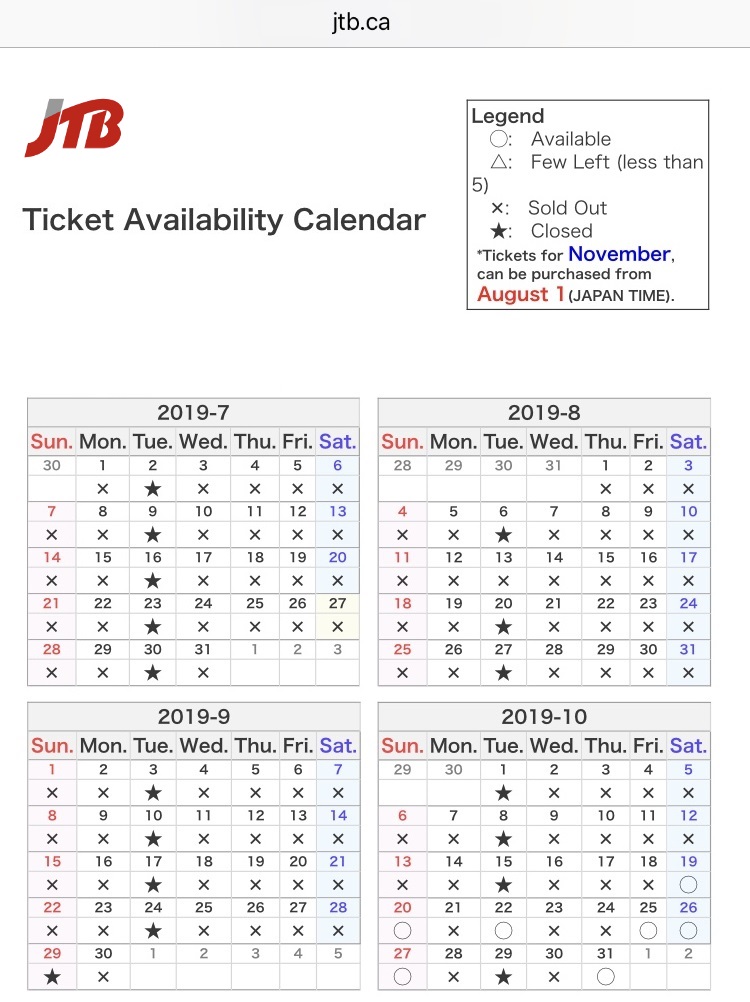

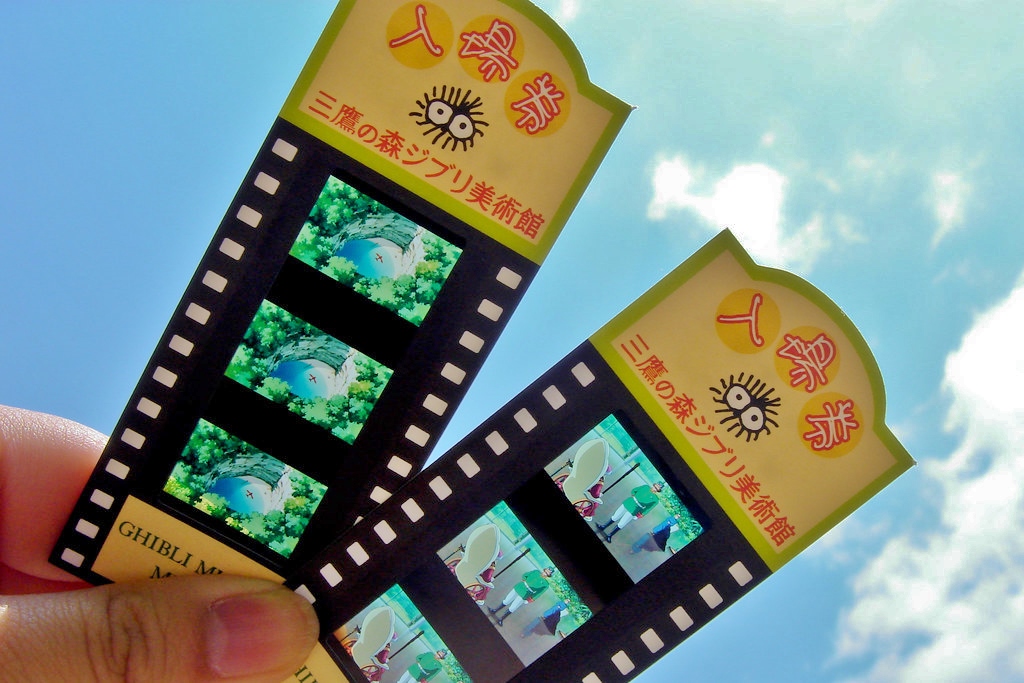


")
")